
Spring Boot3+Vue3极速整合: 10分钟搭建DeepSeek AI对话系统(进阶)
Spring Boot3+Vue3极速整合: 10分钟搭建DeepSeek AI对话系统(进阶)
前言
在上次实战指南《Spring Boot3+Vue2极速整合: 10分钟搭建DeepSeek AI对话系统》引发读者热议后,我通过200+真实用户反馈锁定了几个问题进行优化进阶处理:
- 每次对话都需重复上下文背景;
- 专业领域回答准确率不足;
- Vue2版本较低。
本文作为系统升级的进阶指南:
- 上下文感知:无需重构架构即可实现多轮对话记忆;
- 精准调优:小样本数据驱动专业领域准确率提升;
技术演进
| 前端架构 | Vue2 | Vue3+组合式API |
| 对话逻辑 | 单轮独立交互 | 上下文连贯 |
| 模型能力 | 通用DeepSeek模型 | LLaMA Factory+LoRA+领域适配 |
环境规格:全程基于Windows11平台(AMD Ryzen5 6600H/16GB内存/RTX3050ti 4GB显存),采用Anaconda环境管理方案。
升级 Vue3
项目搭建脚本
# 默认即可
vue create codingce-deepspeek-front-v3
# 进入项目文件夹
cd .\codingce-deepspeek-front-v3\
# 下载依赖包
npm i

# Vue2项目升级Vue3配置

# 运行 Vue3 项目
npm run serve
预览图

组件代码更新(DeepSeek生成)
<template>
  <div class="chat-container">
    <div class="message-container" ref="messageContainer">
      <div
        v-for="(message, index) in messages"
        :key="index"
        :class="['message', message.type + '-message']"
      >
        <div v-if="message.type === 'bot'" v-html="renderMarkdown(message.content)"></div>
        <div v-else>{{ message.content }}</div>
      </div>
    </div>
    <div class="input-container">
      <input
        v-model="inputMessage"
        @keyup.enter="sendMessage"
        placeholder="输入您的问题...(微信公众号:后端码匠)"
        class="message-input"
        :disabled="!isConnected"
      >
      <button
        @click="sendMessage"
        class="send-button"
        :disabled="!isConnected"
      >
        发送
      </button>
    </div>
    <div v-if="!isConnected" class="connection-status">
      连接已断开,正在重新连接...
    </div>
  </div>
</template>

<script setup>
import { ref, onMounted, onBeforeUnmount, nextTick } from 'vue';
import SockJS from 'sockjs-client';
import { marked } from 'marked';
import DOMPurify from 'dompurify';

const messages = ref([]);
const inputMessage = ref('');
const isConnected = ref(false);
const ws = ref(null);
const reconnectAttempts = ref(0);
const maxReconnectAttempts = 5;
const messageContainer = ref(null);
const currentResponse = ref('');

marked.setOptions({
  gfm: true,
  breaks: true
});

const renderMarkdown = (content) => DOMPurify.sanitize(marked(content));

const initWebSocket = () => {
  try {
    ws.value = new SockJS('http://localhost:8080/chat');

    ws.value.onopen = () => {
      console.log('WebSocket连接已建立');
      isConnected.value = true;
      reconnectAttempts.value = 0;
    };

    ws.value.onmessage = (event) => {
      if (event.data) {
        try {
          const response = JSON.parse(event.data);
          appendMessage(response.error ? 'error' : 'bot', response.error || response.content || event.data);
        } catch (e) {
          appendMessage('bot', event.data);
        }
      }
    };

    ws.value.onerror = (error) => {
      console.error('WebSocket错误:', error);
      isConnected.value = false;
      appendMessage('error', '连接发生错误,正在尝试重新连接...');
    };

    ws.value.onclose = () => {
      console.log('WebSocket连接已关闭');
      isConnected.value = false;
      reconnect();
    };
  } catch (error) {
    console.error('WebSocket初始化失败:', error);
    isConnected.value = false;
    appendMessage('error', '连接初始化失败,请刷新页面重试');
  }
};

const reconnect = () => {
  if (reconnectAttempts.value < maxReconnectAttempts) {
    reconnectAttempts.value++;
    console.log(`尝试重新连接... (${reconnectAttempts.value}/${maxReconnectAttempts})`);
    setTimeout(initWebSocket, 3000);
  }
};

const sendMessage = () => {
  if (inputMessage.value.trim() && isConnected.value) {
    try {
      ws.value.send(inputMessage.value);
      appendMessage('user', inputMessage.value);
      inputMessage.value = '';
    } catch (error) {
      console.error('发送消息失败:', error);
      isConnected.value = false;
    }
  }
};

const appendMessage = (type, content) => {
  if (type === 'user') {
    messages.value.push({ type, content });
    currentResponse.value = '';
    messages.value.push({ type: 'bot', content: '' });
  } else if (type === 'bot') {
    currentResponse.value += content;
    if (messages.value.length > 0) {
      messages.value[messages.value.length - 1].content = currentResponse.value;
    }
  } else {
    messages.value.push({ type, content });
  }

  nextTick(() => {
    if (messageContainer.value) {
      messageContainer.value.scrollTop = messageContainer.value.scrollHeight;
    }
  });
};

onMounted(initWebSocket);
onBeforeUnmount(() => {
  if (ws.value) {
    ws.value.close();
    ws.value = null;
  }
});
</script>

<style scoped>
.chat-container {
  max-width: 800px;
  margin: 0 auto;
  padding: 5px;
  height: calc(100vh - 80px);
  display: flex;
  flex-direction: column;
  overflow: hidden;
}

.message-container {
  flex: 1;
  border: 1px solid #ddd;
  border-radius: 4px;
  padding: 20px;
  overflow-y: auto;
  margin-bottom: 20px;
  background: #f9f9f9;
}

.input-container {
  display: flex;
  gap: 10px;
}

.message-input {
  flex: 1;
  padding: 12px;
  border: 1px solid #ddd;
  border-radius: 4px;
  font-size: 14px;
}

.message-input:disabled,
.send-button:disabled {
  opacity: 0.6;
  cursor: not-allowed;
}

.send-button {
  padding: 0 20px;
  background: #000000;
  color: white;
  border: none;
  border-radius: 4px;
  cursor: pointer;
  transition: background 0.3s;
}

.send-button:hover:not(:disabled) {
  background: #aea9f8;
}

.message {
  margin: 10px 0;
  padding: 10px;
  border-radius: 4px;
  max-width: 80%;
  white-space: pre-wrap;
  word-break: break-word;
  line-height: 1.5;
}

.user-message {
  color: #000000;
  background: #f8edd7;
  margin-left: auto;
}

.bot-message {
  color: #000000;
  background: #f0f9eb;
  font-size: 14px;
  font-family: "Microsoft YaHei", sans-serif;
}

.bot-message :deep(h1),
.bot-message :deep(h2),
.bot-message :deep(h3),
.bot-message :deep(h4),
.bot-message :deep(h5),
.bot-message :deep(h6) {
  margin: 8px 0;
  font-weight: 600;
}

.bot-message :deep(p) {
  margin: 8px 0;
  line-height: 1.6;
}

.bot-message :deep(code) {
  background-color: #f3f3f3;
  padding: 2px 4px;
  border-radius: 3px;
  font-family: Consolas, Monaco, 'Andale Mono', monospace;
}

.bot-message :deep(pre) {
  background-color: #f6f8fa;
  padding: 16px;
  border-radius: 6px;
  overflow-x: auto;
}

.bot-message :deep(pre code) {
  background-color: transparent;
  padding: 0;
}

.bot-message :deep(ul),
.bot-message :deep(ol) {
  padding-left: 20px;
  margin: 8px 0;
}

.bot-message :deep(blockquote) {
  margin: 8px 0;
  padding-left: 10px;
  border-left: 4px solid #dfe2e5;
  color: #6a737d;
}

.bot-message :deep(table) {
  border-collapse: collapse;
  width: 100%;
  margin: 8px 0;
}

.bot-message :deep(th),
.bot-message :deep(td) {
  border: 1px solid #dfe2e5;
  padding: 6px 13px;
}

.bot-message :deep(th) {
  background-color: #f6f8fa;
}

.bot-message :deep(a) {
  color: #0366d6;
  text-decoration: none;
}

.bot-message :deep(a:hover) {
  text-decoration: underline;
}

.bot-message :deep(img) {
  max-width: 100%;
  height: auto;
}

.connection-status {
  text-align: center;
  color: #E6A23C;
  padding: 10px;
  background: #fdf6ec;
  border-radius: 4px;
  margin-top: 10px;
}

.error-message {
  color: #F56C6C;
  background: #fef0f0;
  margin-left: auto;
  margin-right: auto;
  text-align: center;
}
</style>
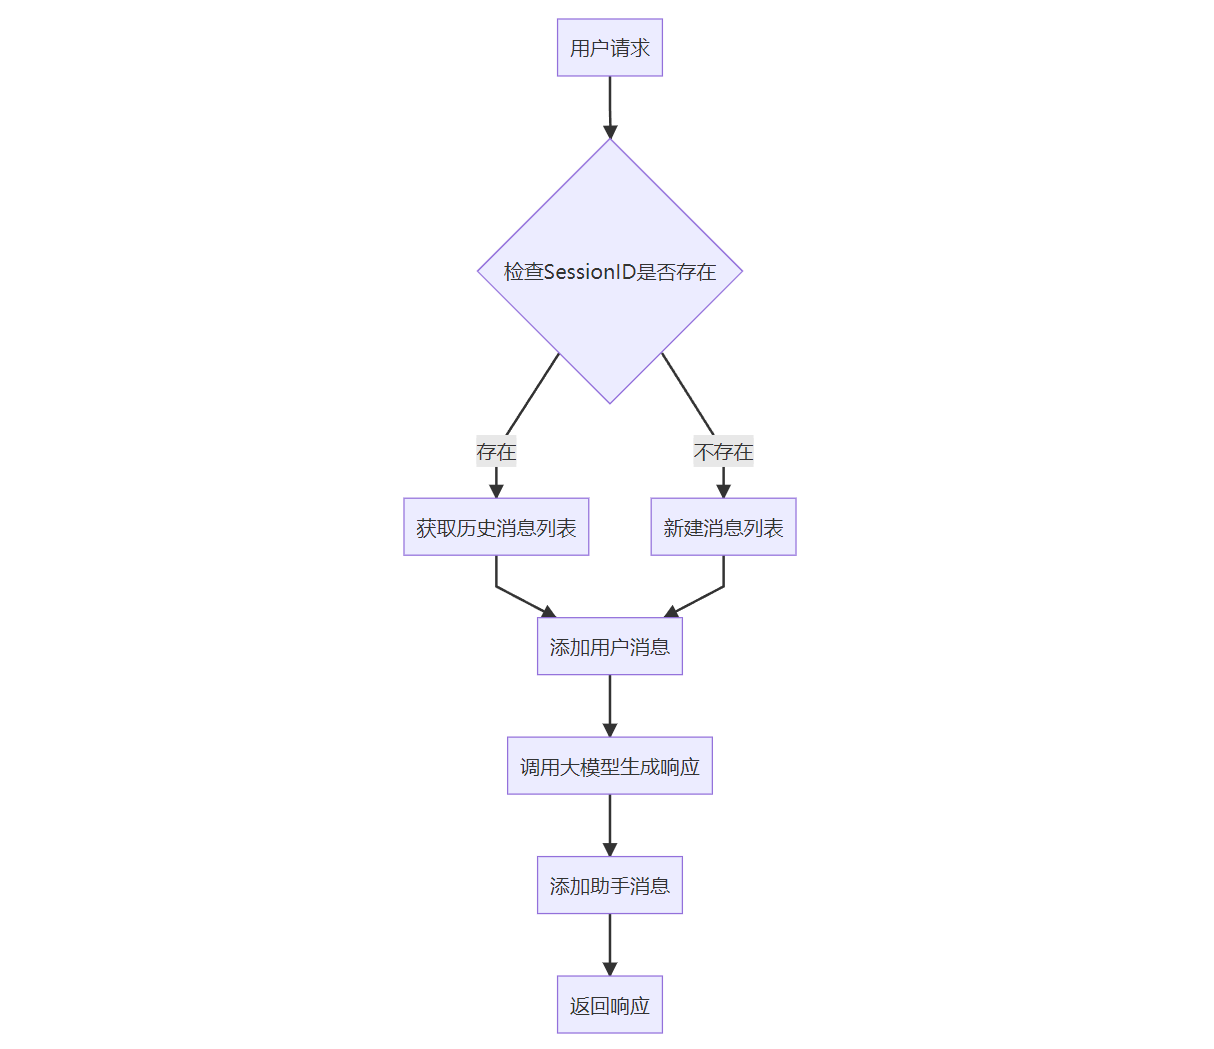
后端实现
通过 ConcurrentHashMap、List 的简洁设计,在保证线程安全的前提下实现了基本的上下文管理功能,后续可通过添加窗口限制、持久化存储等机制进一步提升商业应用场景下的可靠性。
| 会话隔离 | sessionId哈希映射 | 支持多用户并发使用 |
| 对话连贯性 | 历史消息全量传递 | 实现多轮上下文理解 |
| 资源可控 | 线性增长的List结构 | 内存占用可预测 |
| 零第三方依赖 | 纯JDK实现 | 降低系统复杂度 |
流程图
代码实现
package cn.com.codingce.deepseek.service;

import lombok.RequiredArgsConstructor;
import lombok.extern.slf4j.Slf4j;
import org.springframework.ai.chat.messages.AssistantMessage;
import org.springframework.ai.chat.messages.Message;
import org.springframework.ai.chat.messages.UserMessage;
import org.springframework.ai.chat.model.ChatResponse;
import org.springframework.ai.chat.prompt.Prompt;
import org.springframework.ai.ollama.OllamaChatModel;
import org.springframework.stereotype.Service;
import reactor.core.publisher.Flux;

import java.util.ArrayList;
import java.util.List;
import java.util.Map;
import java.util.concurrent.ConcurrentHashMap;

@Slf4j
@Service
@RequiredArgsConstructor
public class DeepSeekService {

    private final OllamaChatModel ollamaChatModel;

    /**
     * 使用 ConcurrentHashMap 维护会话上下文(线程安全)
     */
    private final Map<String, List<Message>> chatContexts = new ConcurrentHashMap<>();

    public Flux<String> handleChatWebSocket(String sessionId, String question) {
        return sendChatRequest(sessionId, question)
                .doOnNext(response -> log.info("handleChatWebSocket 发送响应: {}", response))
                .onErrorResume(e -> {
                    log.error("handleChatWebSocket 通信错误: {}", e.getMessage());
                    return Flux.just("服务器处理请求时发生错误,请稍后重试。");
                });
    }

    public Flux<String> sendChatRequest(String sessionId, String question) {
        // 获取或创建会话历史
        List<Message> context = chatContexts
                .computeIfAbsent(sessionId, k -> new ArrayList<>());

        // 添加用户新消息到上下文
        context.add(new UserMessage(question));

        // 创建包含历史上下文的 Prompt
        ChatResponse response = ollamaChatModel.call(new Prompt(context));

        // 获取模型回复
        String answer = response.getResult().getOutput().getContent();

        // 添加助手回复到上下文
        context.add(new AssistantMessage(answer));

        log.info("会话 {} 的上下文长度: {}", sessionId, context.size());

        return Flux.just(answer);
    }

}
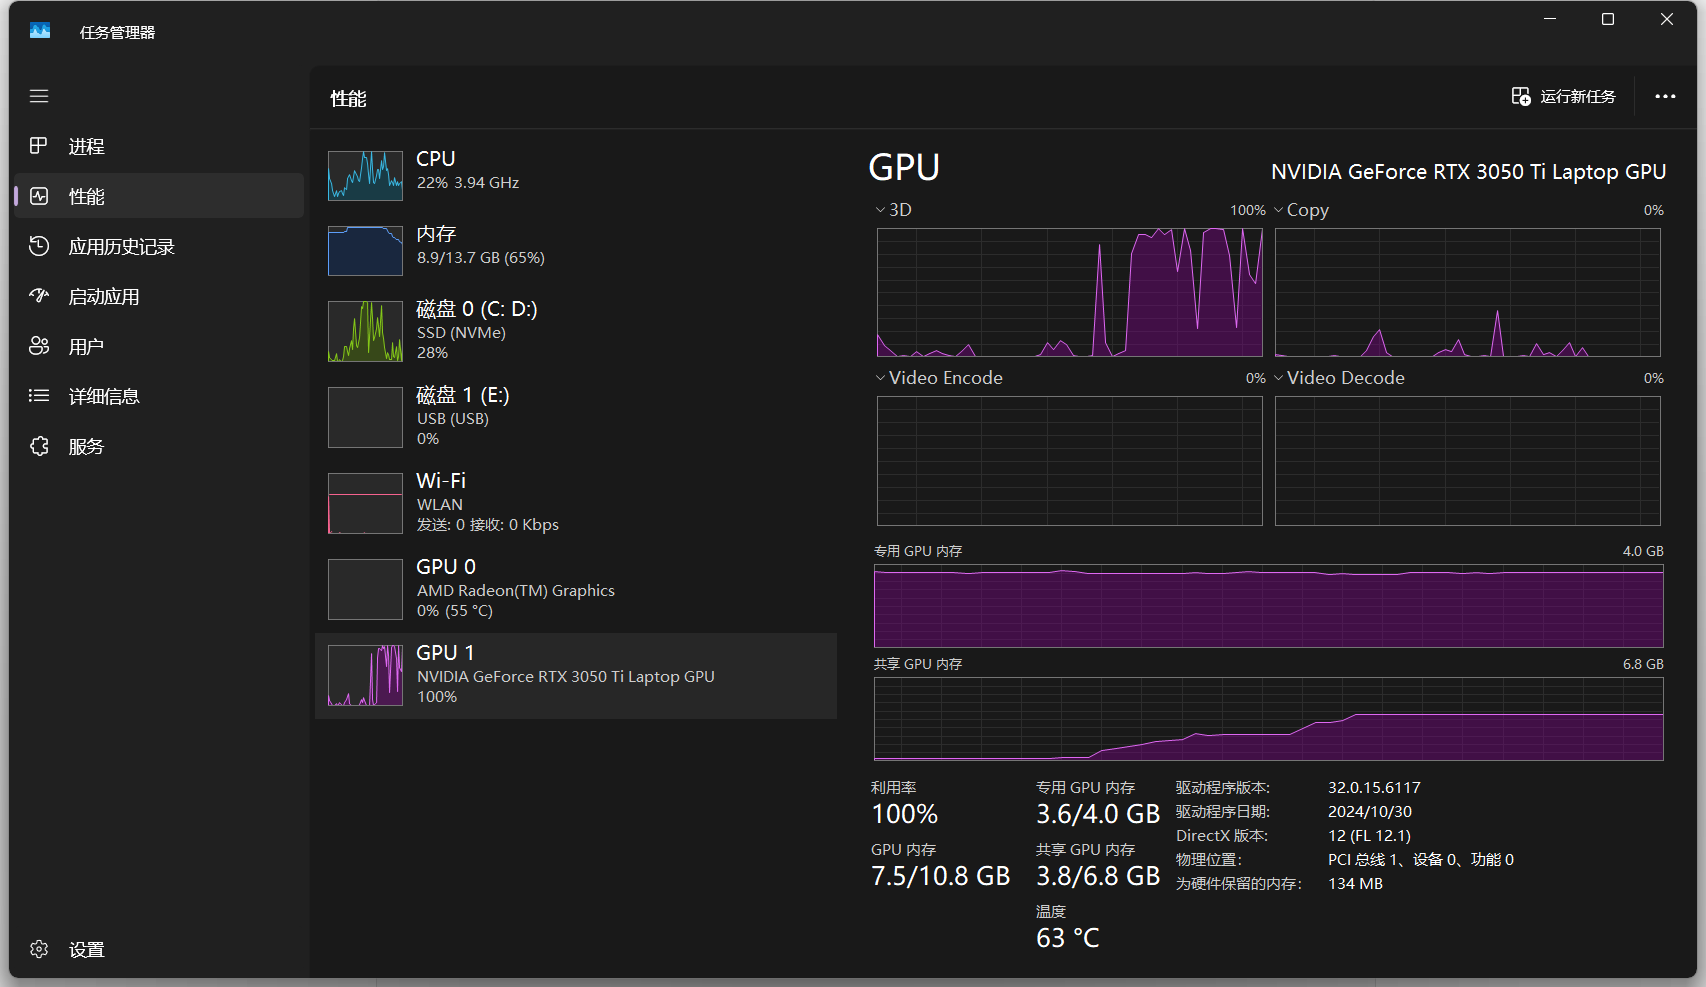
任务管理器
跑问题的时候GPU已经满了。
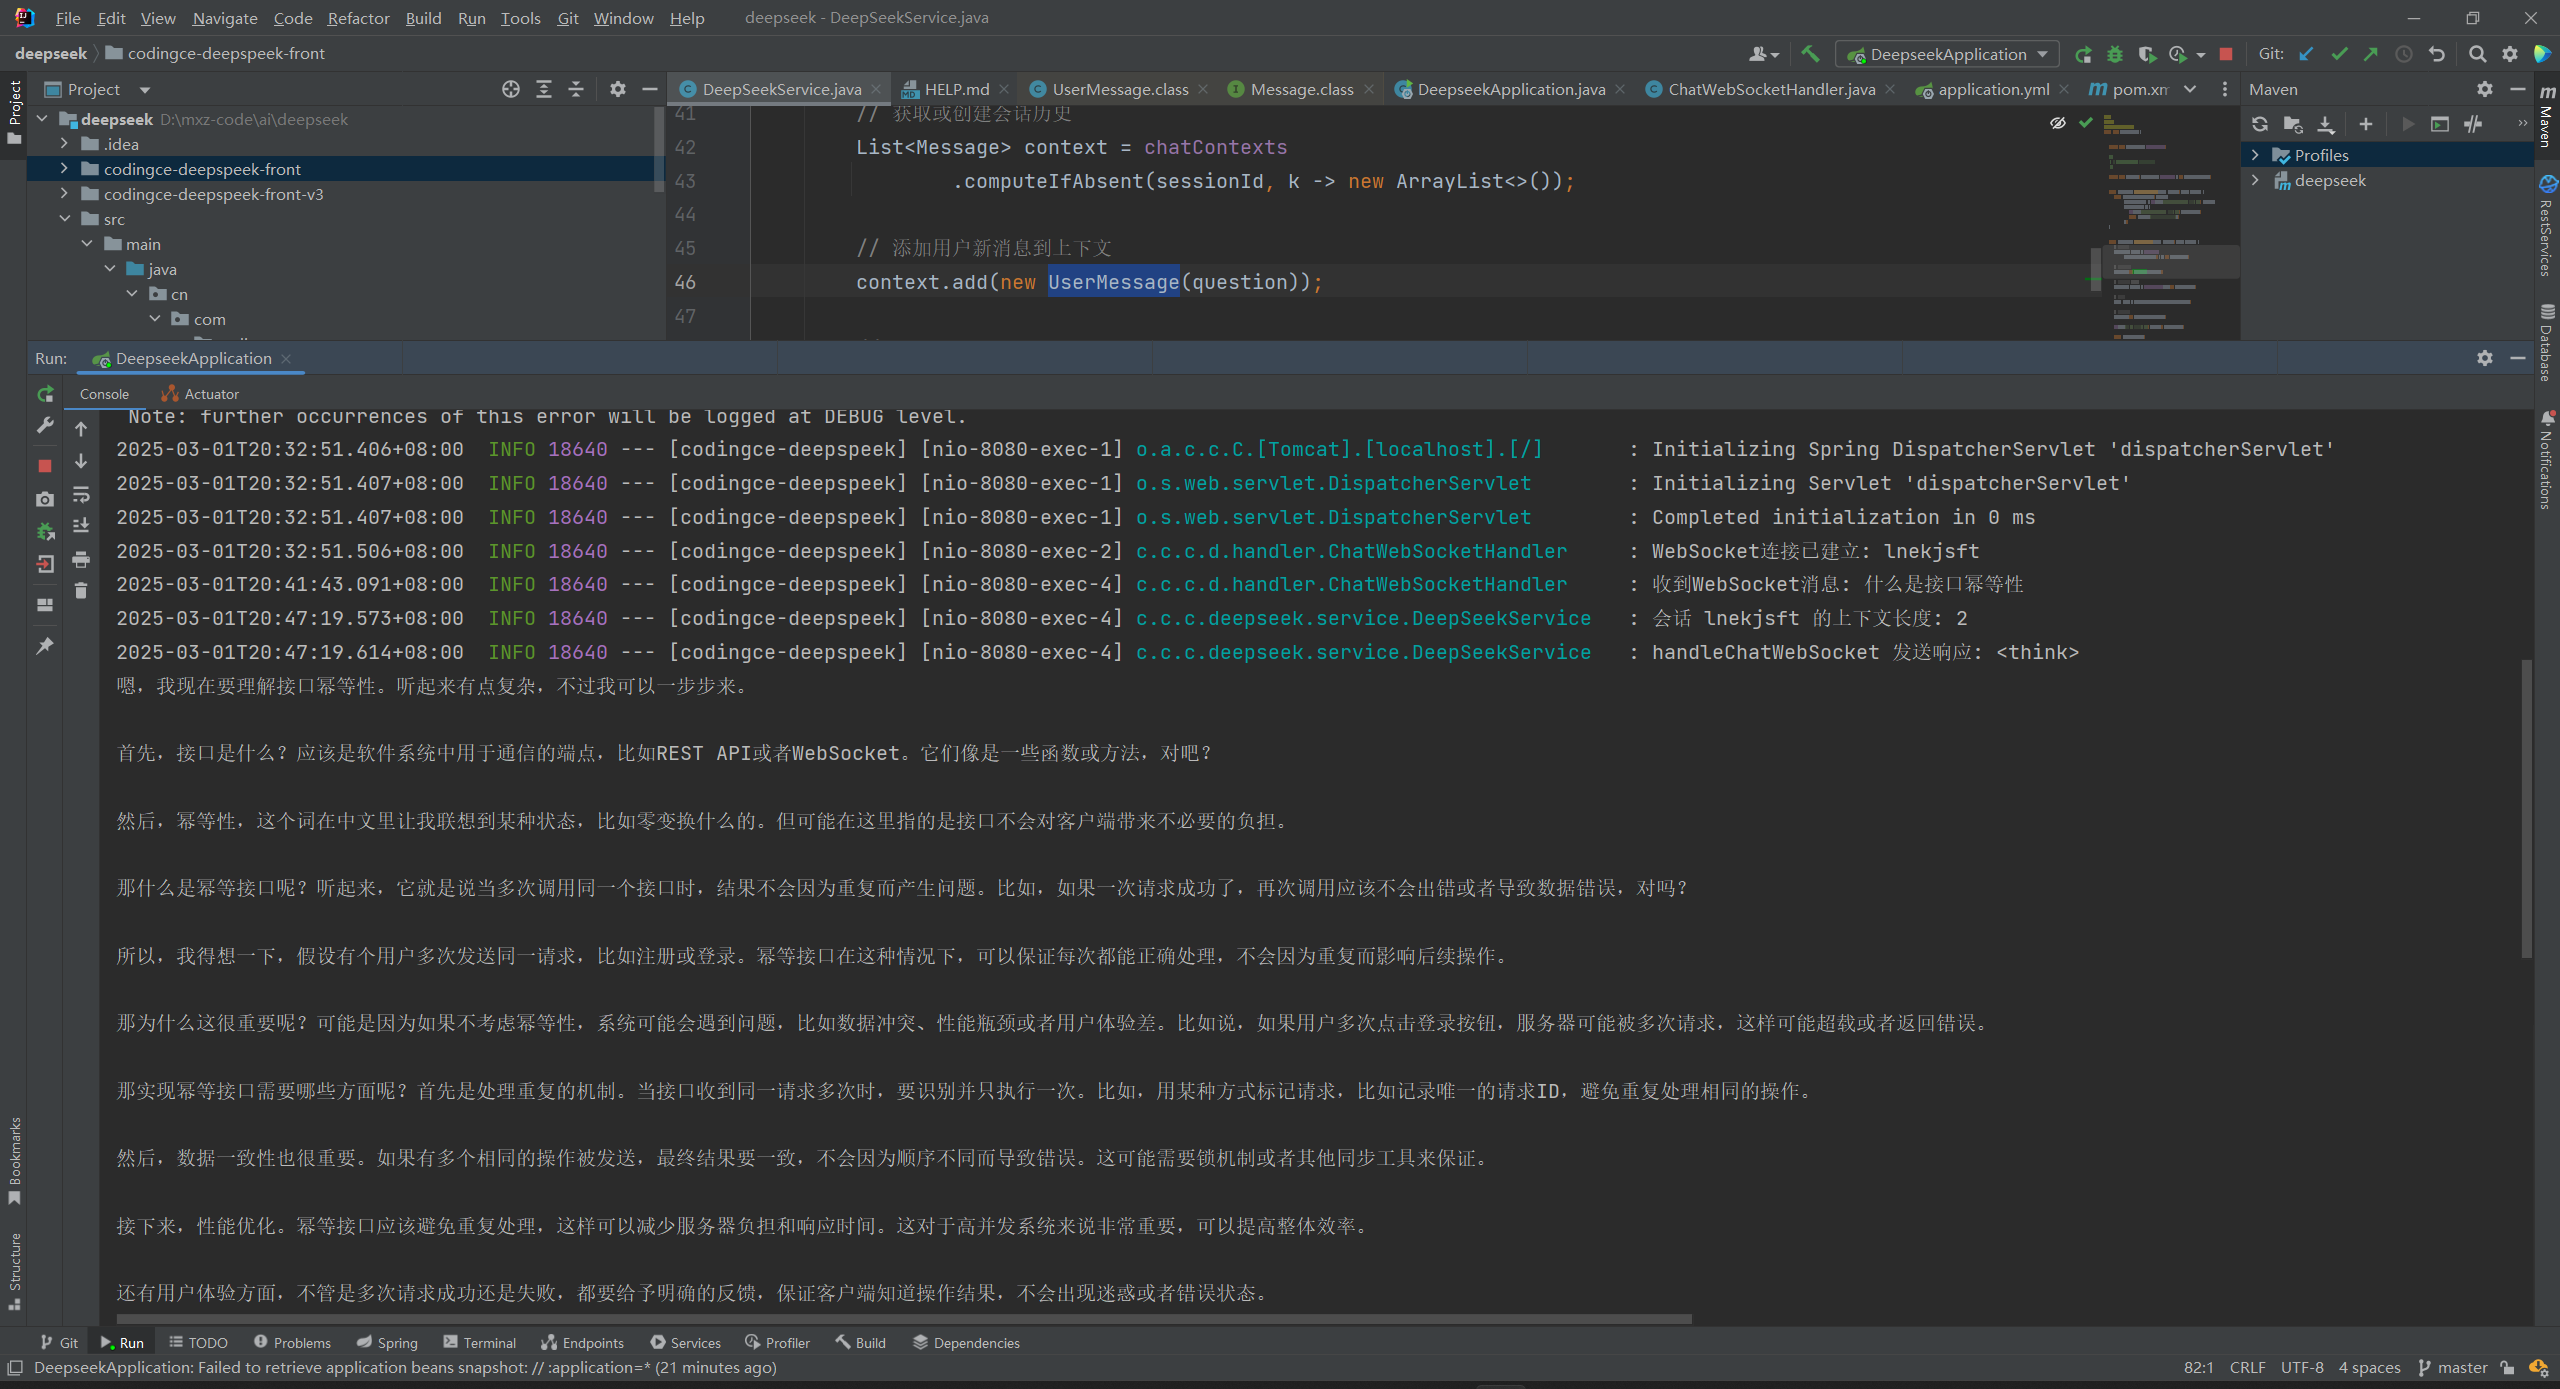
上下文连贯调试
1、什么是接口幂等性
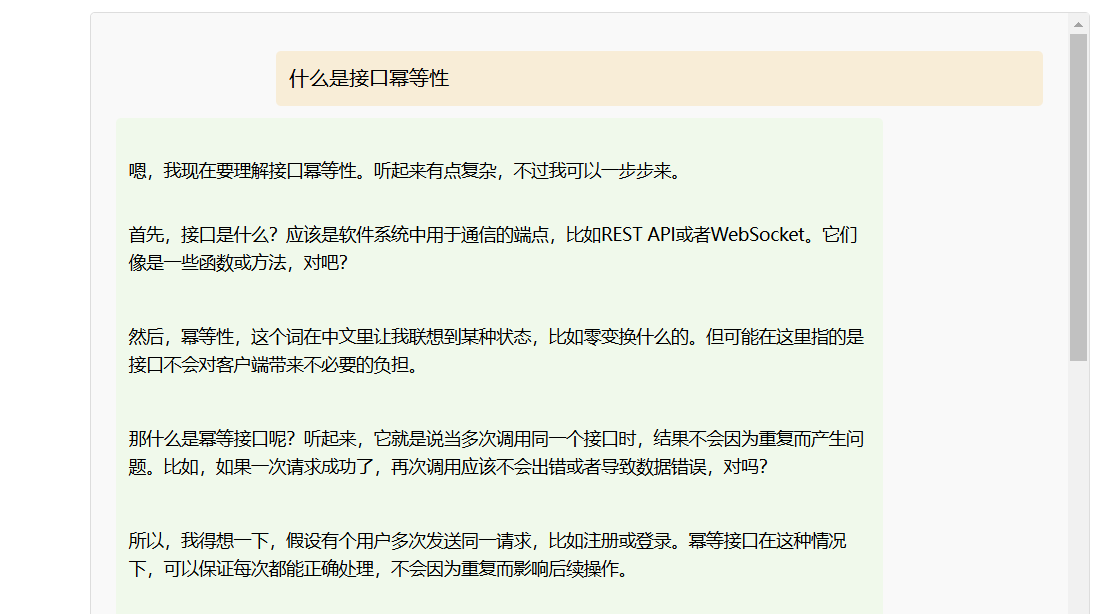
后端log如下:
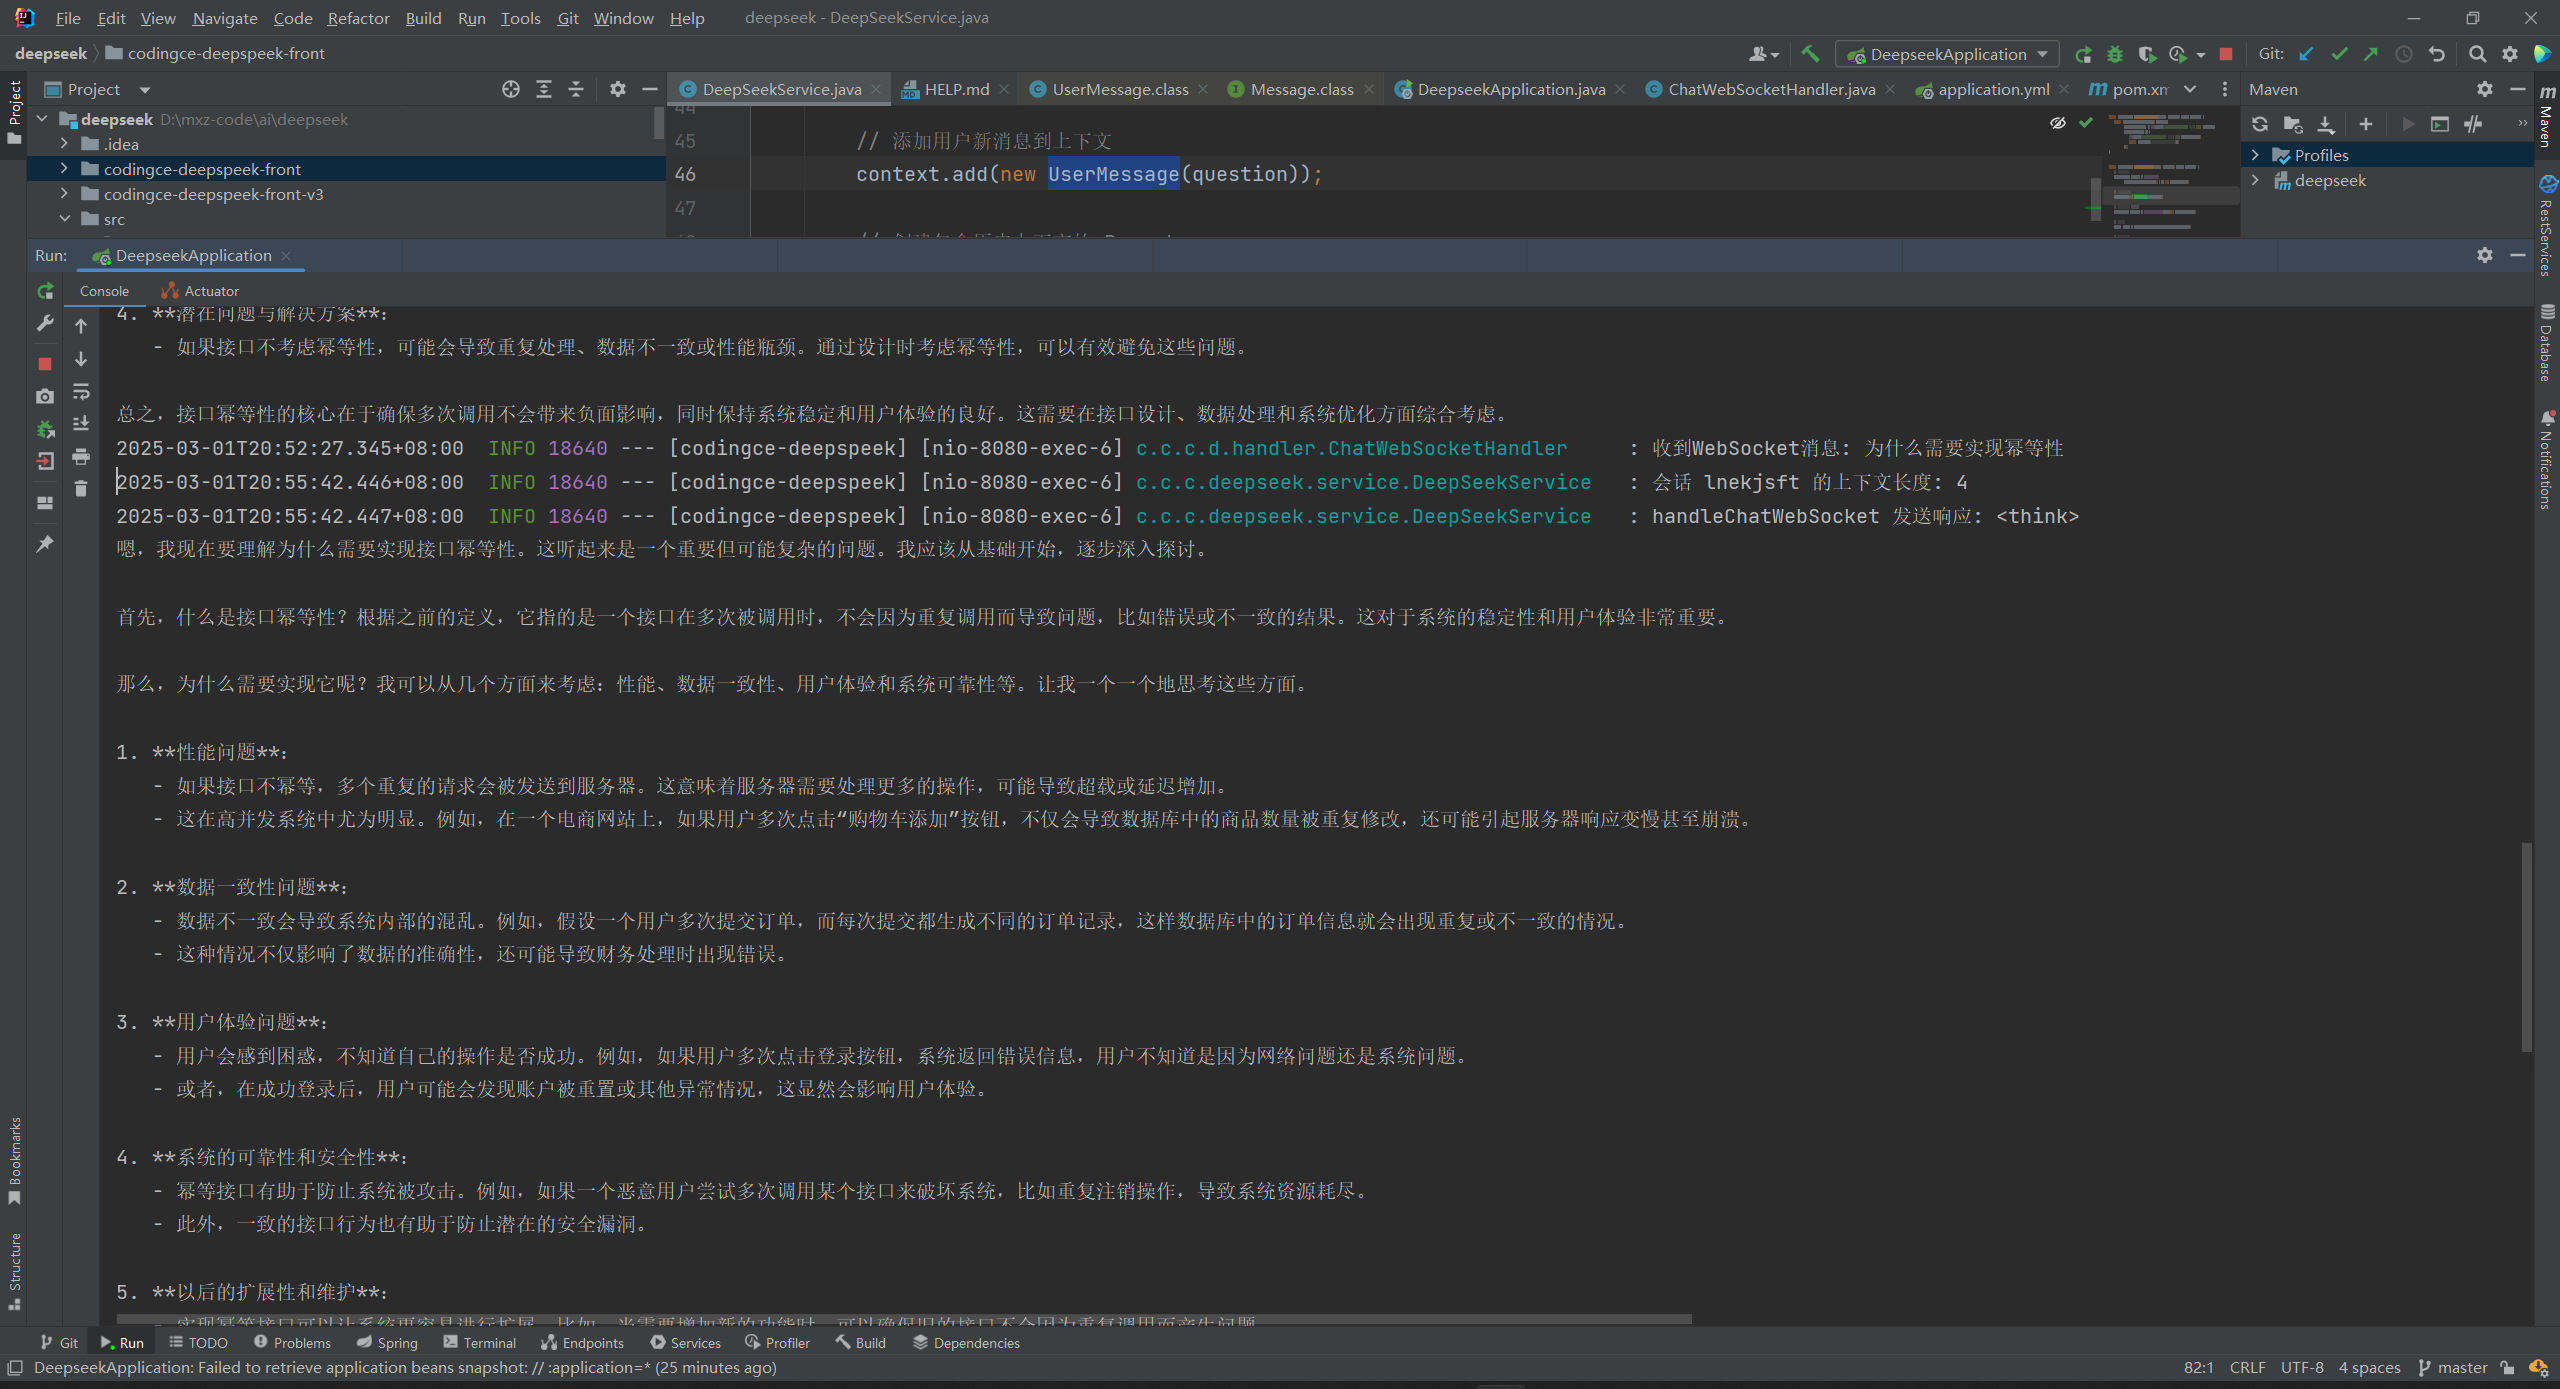
2、为什么需要实现幂等性
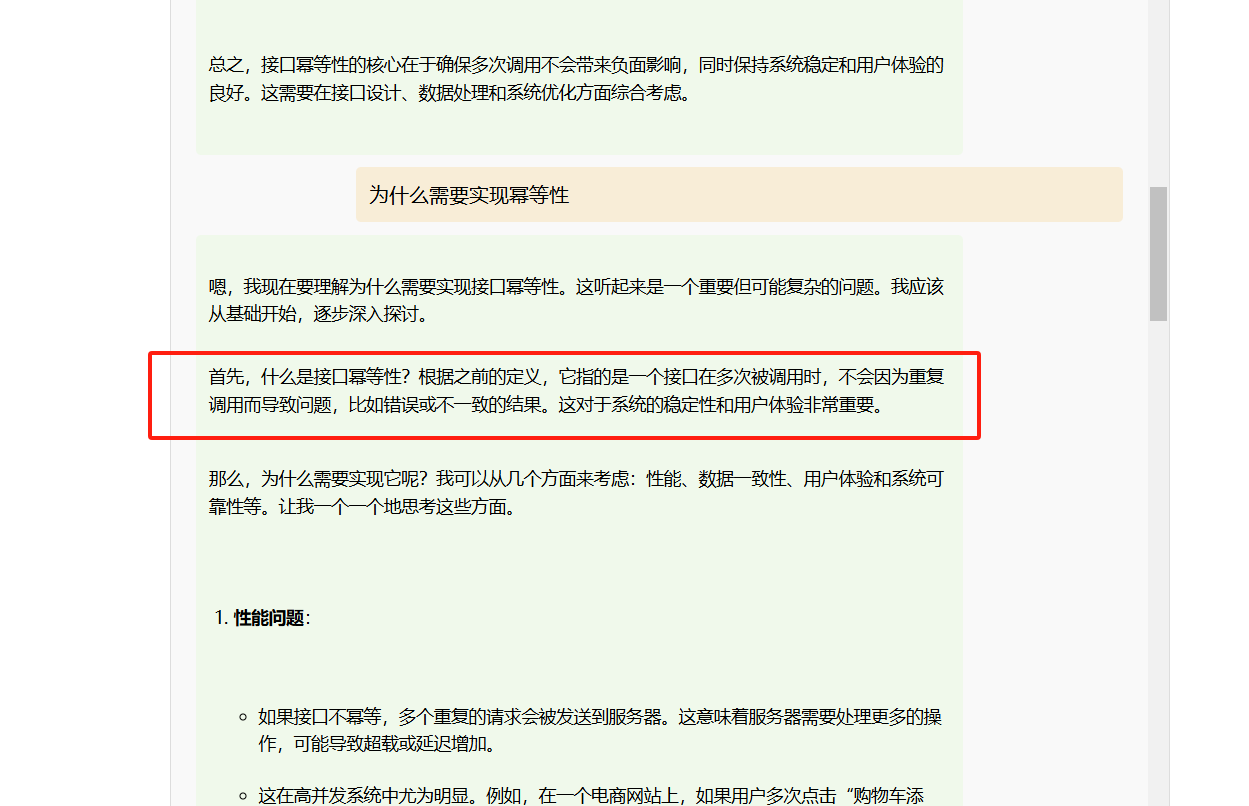
后端log如下:
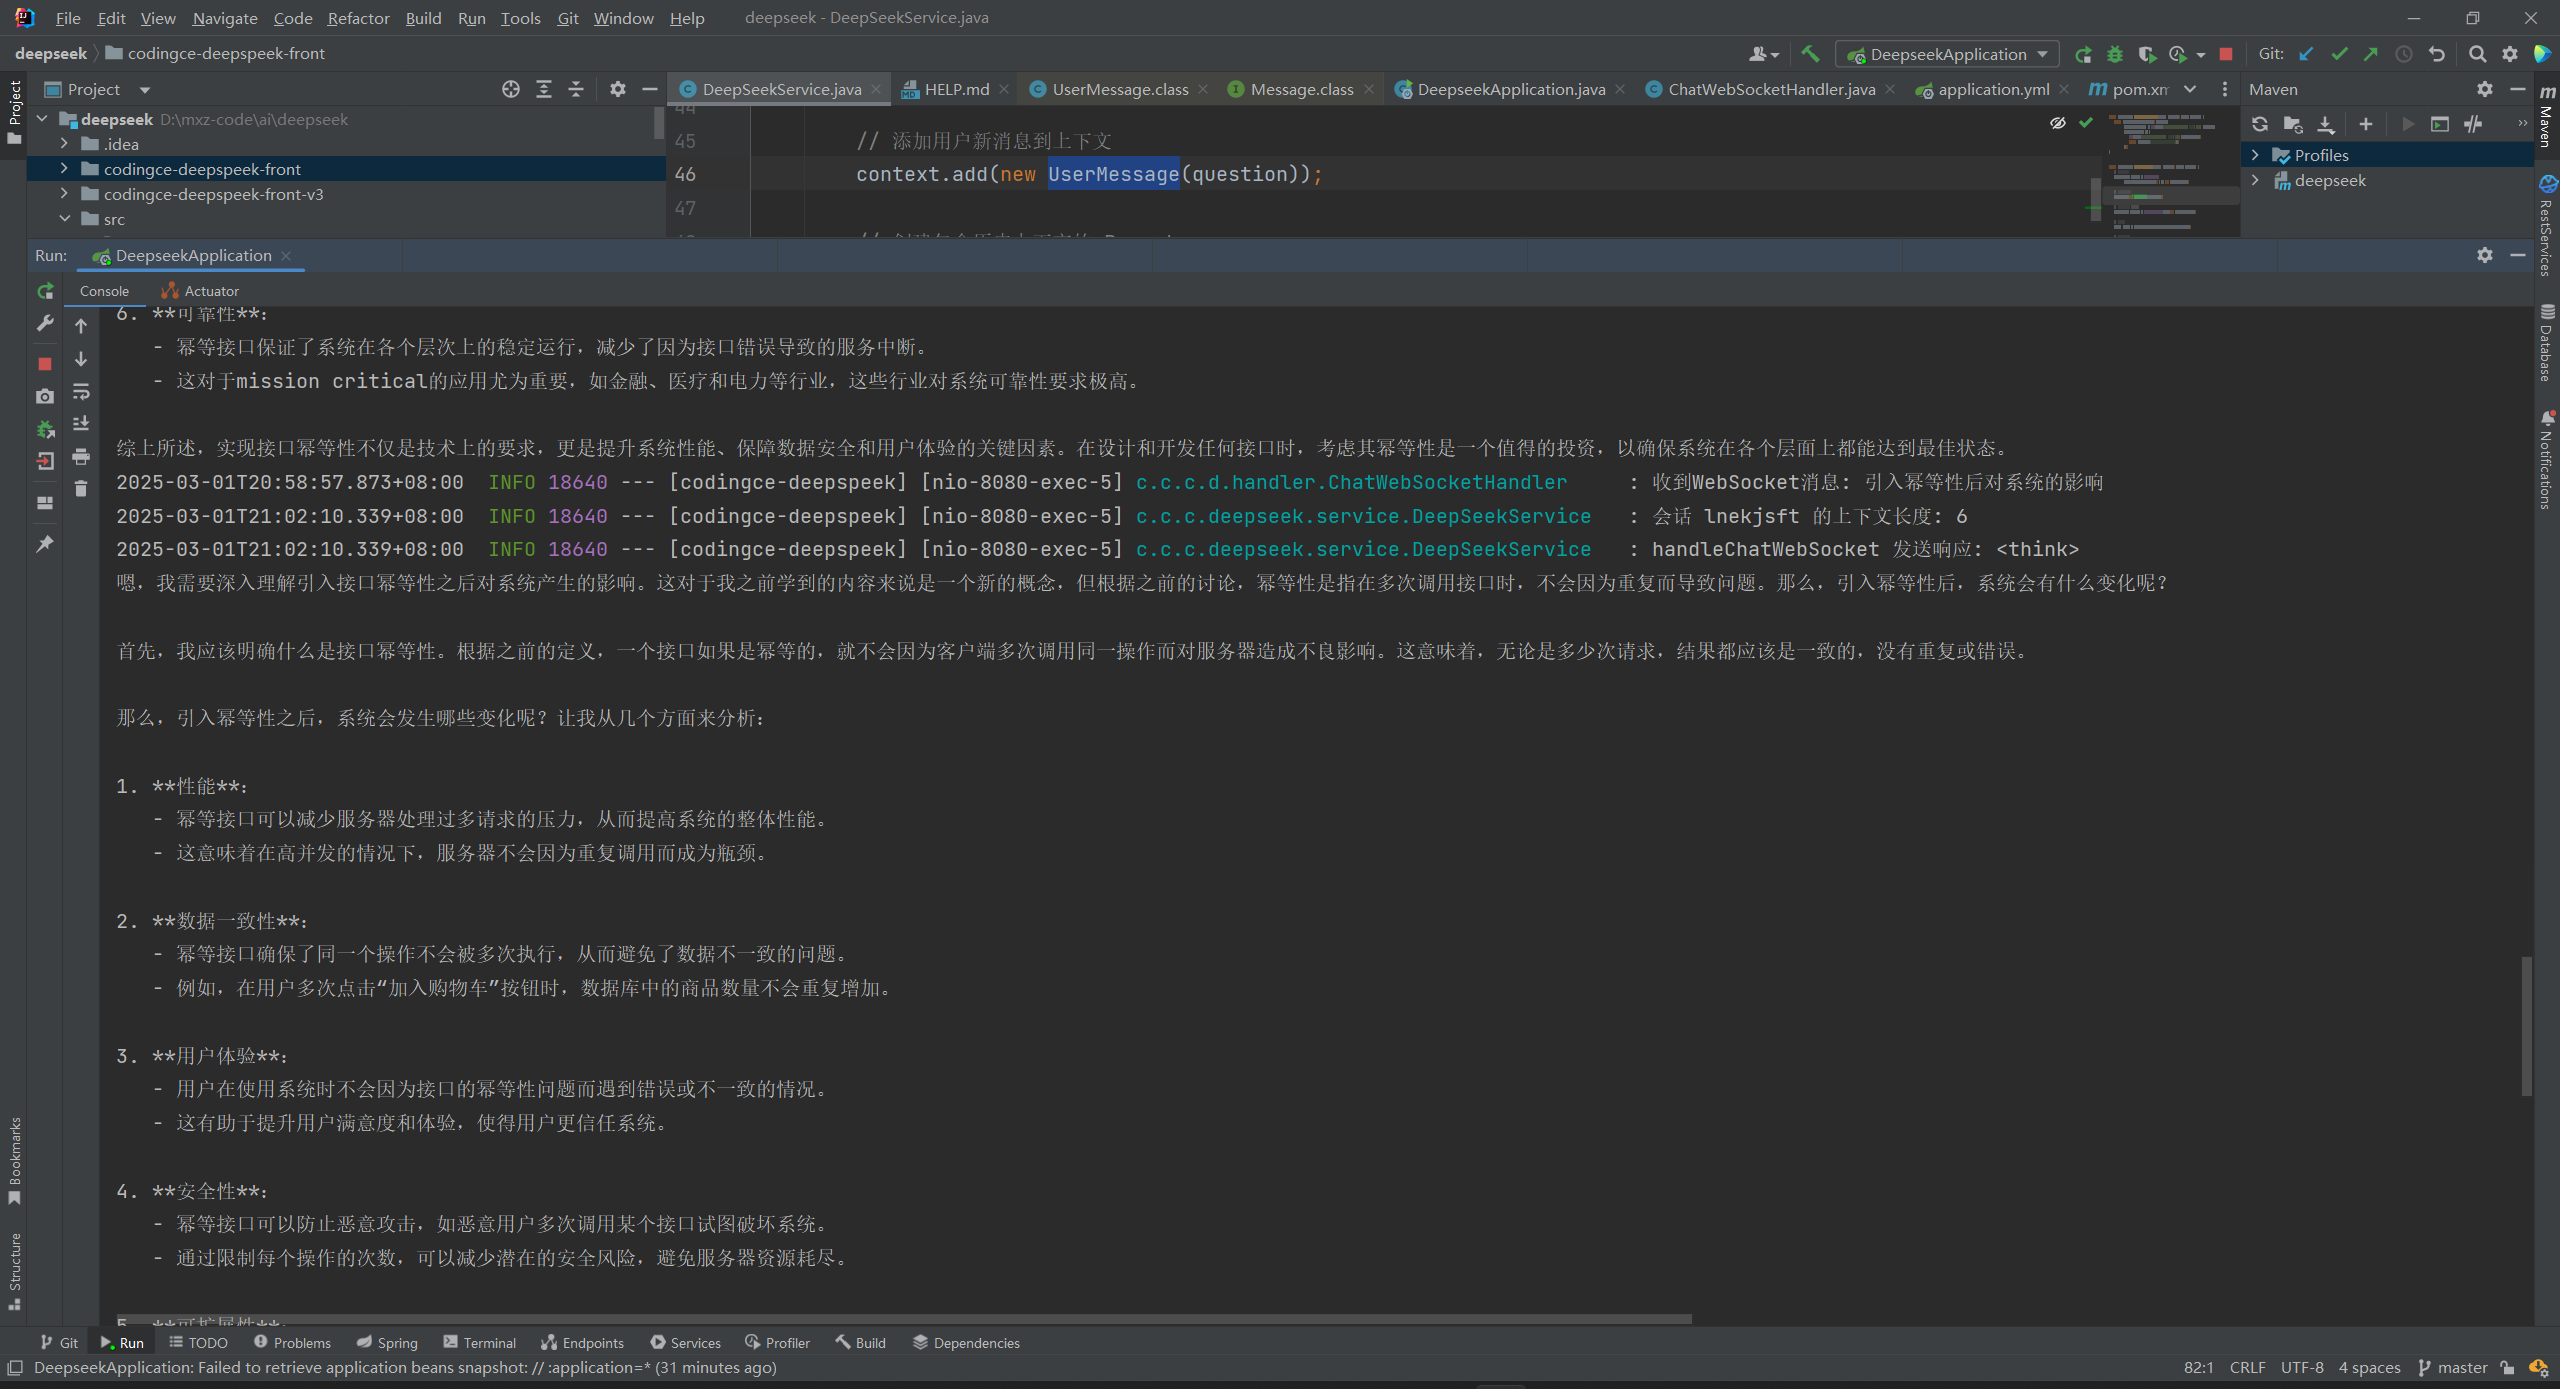
3、引入幂等性后对系统的影响
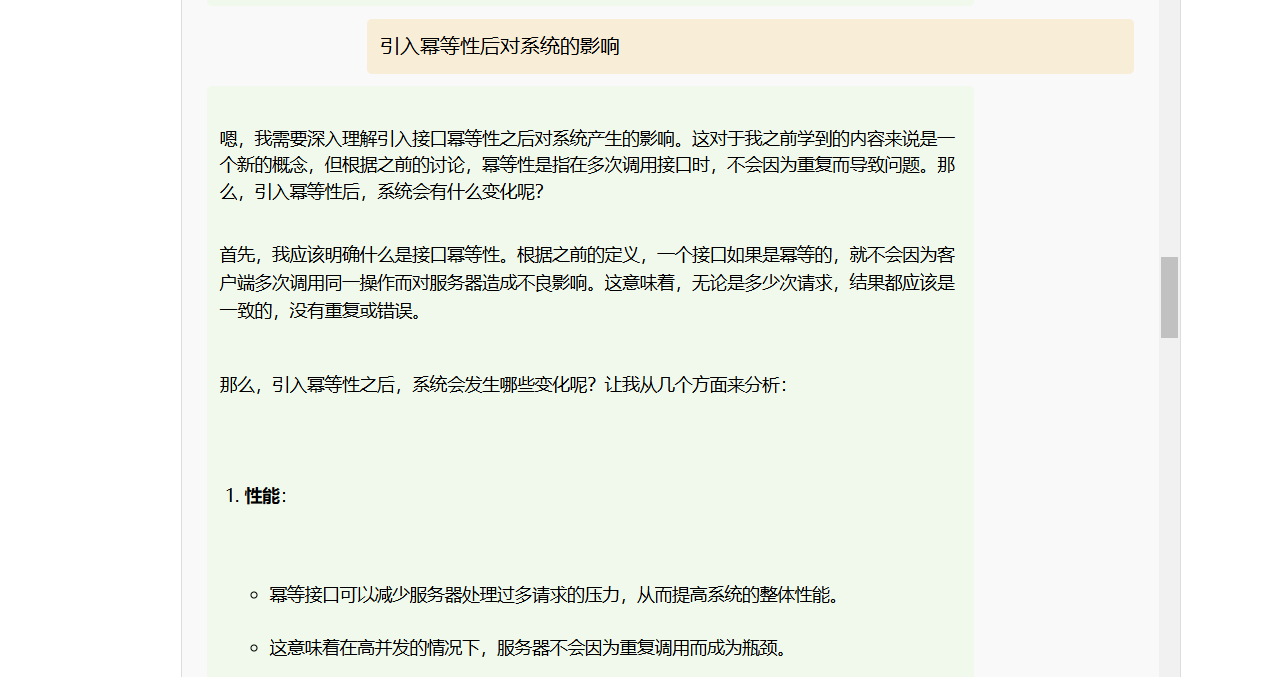
后端log如下:
LLaMA-Factory 微调专业大模型(进阶)
到这里其实文章就可以结束了,不过肯定有朋友和我一样对如何训练模型感兴趣,下面我介绍下是如何训练本地大模型,有经验的读者可以自己尝试,建议C盘100G+,并且有Python技能背景,里面的坑还是很多的,下面进入正题(毕竟不是专业的,如有问题欢迎讨论,
折腾下来硬盘都满了)。

LLaMA-Factory是一个在github上开源的,专为大模型训练设计的平台。项目提供中文说明,可以参考官方文档:https://github.com/hiyouga/LLaMA-Factory/blob/main/README_zh.md
本次目的就是借助 LLaMA-Factory 来调试 Hugging Face 上的模型,并导出成本地 Ollama 可运行的专业小模型。
使用零代码命令行与 Web UI 轻松微调百余种大模型

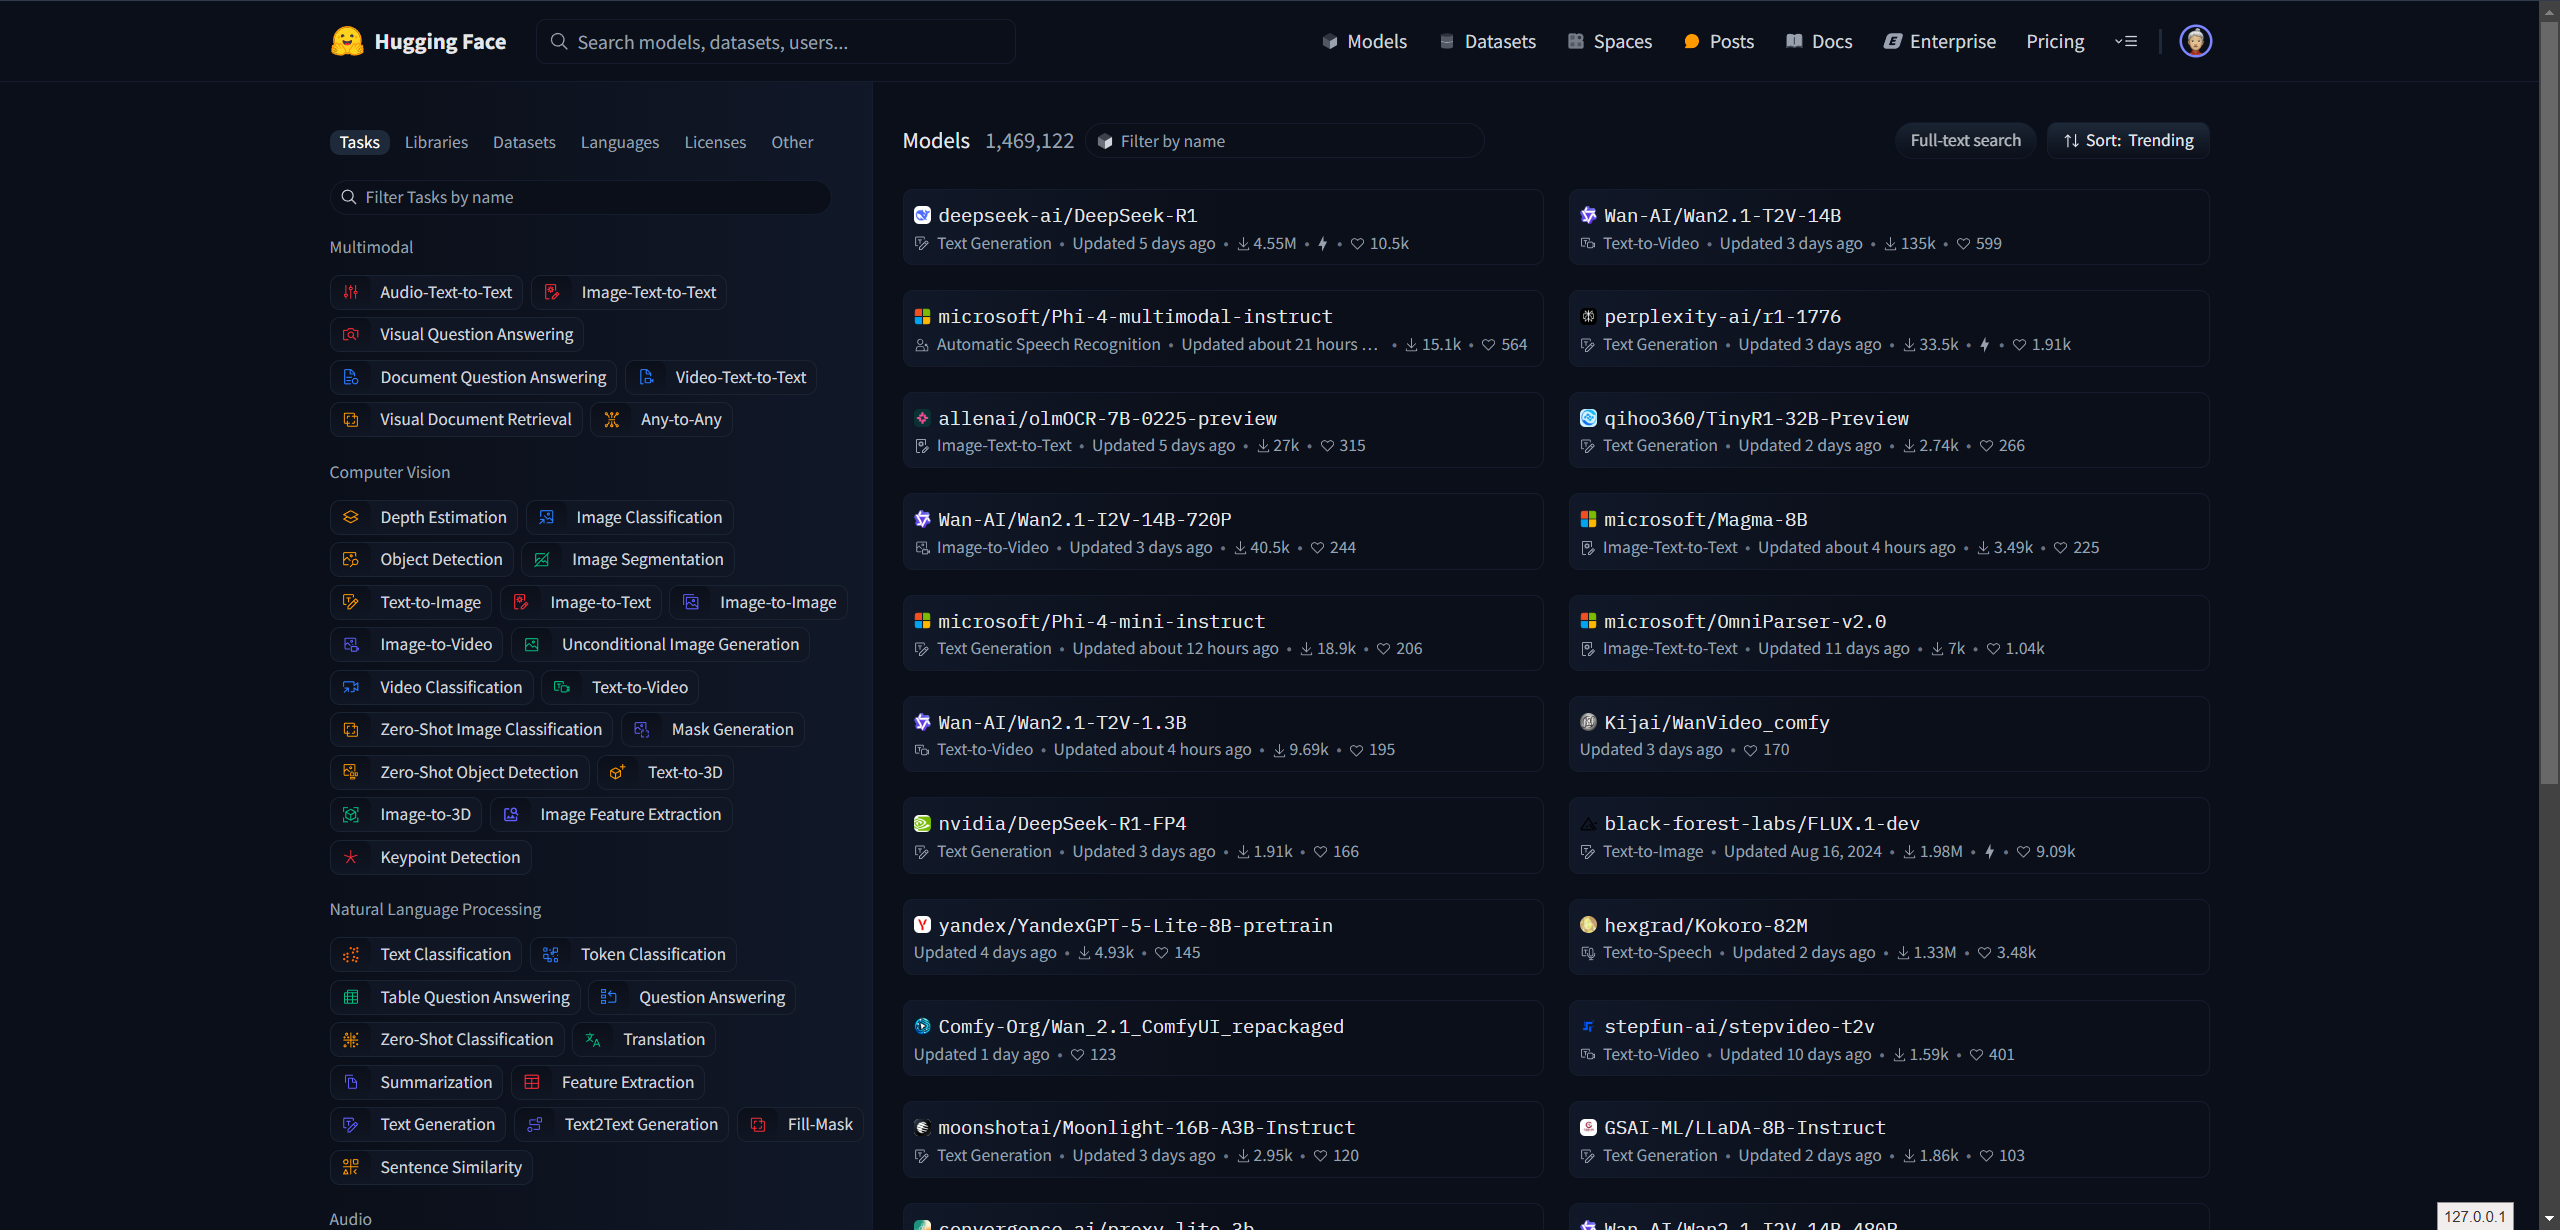
Hugging Face
Hugging Face 是一个致力于推动自然语言处理(NLP)技术发展的开源社区与创新公司。作为 NLP 领域的领军者,Hugging Face 为开发者提供了丰富的工具和资源,涵盖从模型训练、微调到部署的全流程解决方案。其核心使命是通过开源共享,降低 NLP 技术的应用门槛,让开发者能够轻松获取并利用最先进的模型和技术。
Hugging Face 的贡献不仅限于 NLP 领域,还扩展到了图像、音频等多模态任务,为人工智能的多领域融合提供了强大支持。其平台汇集了海量的预训练模型和高质量数据集,涵盖了从文本生成、情感分析到图像分类、语音识别等多种应用场景。这些资源不仅为研究者提供了强大的实验基础,也为企业级应用提供了高效的解决方案。
凭借其开放性和创新性,Hugging Face 已成为全球开发者和研究者的重要技术枢纽,持续推动着人工智能技术的普及与进步。无论是学术研究还是工业应用,Hugging Face 都扮演着不可或缺的角色,为 AI 社区注入了源源不断的活力。
这个还是很好玩的,比如自己写个调大模型的例子,使用 transformers 就可以用下面代码调用 Hugging Face 上的情感分析开源模型:
from transformers import pipeline

classifier = pipeline("sentiment-analysis")
res = classifier("Today is a nice day")

print(res)
控制台输出LOG
(tensorflow) PS D:\mxz-code\ai\python> python test.py
D:\anaconda3\envs\tensorflow\Lib\site-packages\transformers\utils\hub.py:106: FutureWarning: Using `TRANSFORMERS_CACHE` is deprecated and will be removed in v5 of Transformers. Use `HF_HOME` instead.
  warnings.warn(
No model was supplied, defaulted to distilbert/distilbert-base-uncased-finetuned-sst-2-english and revision 714eb0f (https://huggingface.co/distilbert/distilbert-base-uncased-finetuned-sst-2-english).
Using a pipeline without specifying a model name and revision in production is not recommended.
Device set to use cuda:0
[{'label': 'POSITIVE', 'score': 0.9998723268508911}]
LoRA
LoRA(Low-Rank Adaptation of Large Language Models)是一种创新的低秩适应技术,专为高效微调大规模语言模型而设计。最初应用于自然语言处理(NLP)领域,LoRA 技术通过引入低秩矩阵分解,仅需训练少量参数即可实现对 GPT-3 等大型模型的精准微调。相较于传统全参数微调方法,LoRA 显著降低了计算资源需求,同时大幅减少了训练成本,使其成为资源受限环境下的理想选择。
LoRA 的使用流程简洁高效。用户只需下载相应的 LoRA 模型和基础 checkpoint 模型,并将其部署到指定目录即可。在实际应用中,LoRA 模型可与主模型协同工作,通过调整权重参数精确控制生成结果。其核心优势包括:
- 训练速度快:仅需微调少量参数,显著缩短训练时间;
- 计算需求低:冻结原始模型参数,仅训练新增的低秩层;
- 存储空间小:训练权重文件通常仅约 3MB,比原始 UNet 模型小近千倍。
现在有 LLaMA-Factory UI界面操作简单的导出,了解LoRA即可,商用得深入。
模型微调环境
Python环境(GPU)
PS C:\Users\24607> conda --version
conda 24.11.3

# tensorflow 名字可改
conda create -n tensorflow python=3.11.7

# 激活 tensorflow
conda activate tensorflow

PS C:\Users\24607> python -V
Python 3.11.7

pip install tensorflow-gpu==2.12.0

conda install pytorch torchvision torchaudio pytorch-cuda=11.8 -c pytorch -c nvidia

pip install transformers
CUDA(ComputeUnified Device Architecture),是显卡厂商NVIDIA推出的运算平台。CUDA是一种由NVIDIA推出的通用并行计算架构,该架构使GPU能够解决复杂的计算问题。
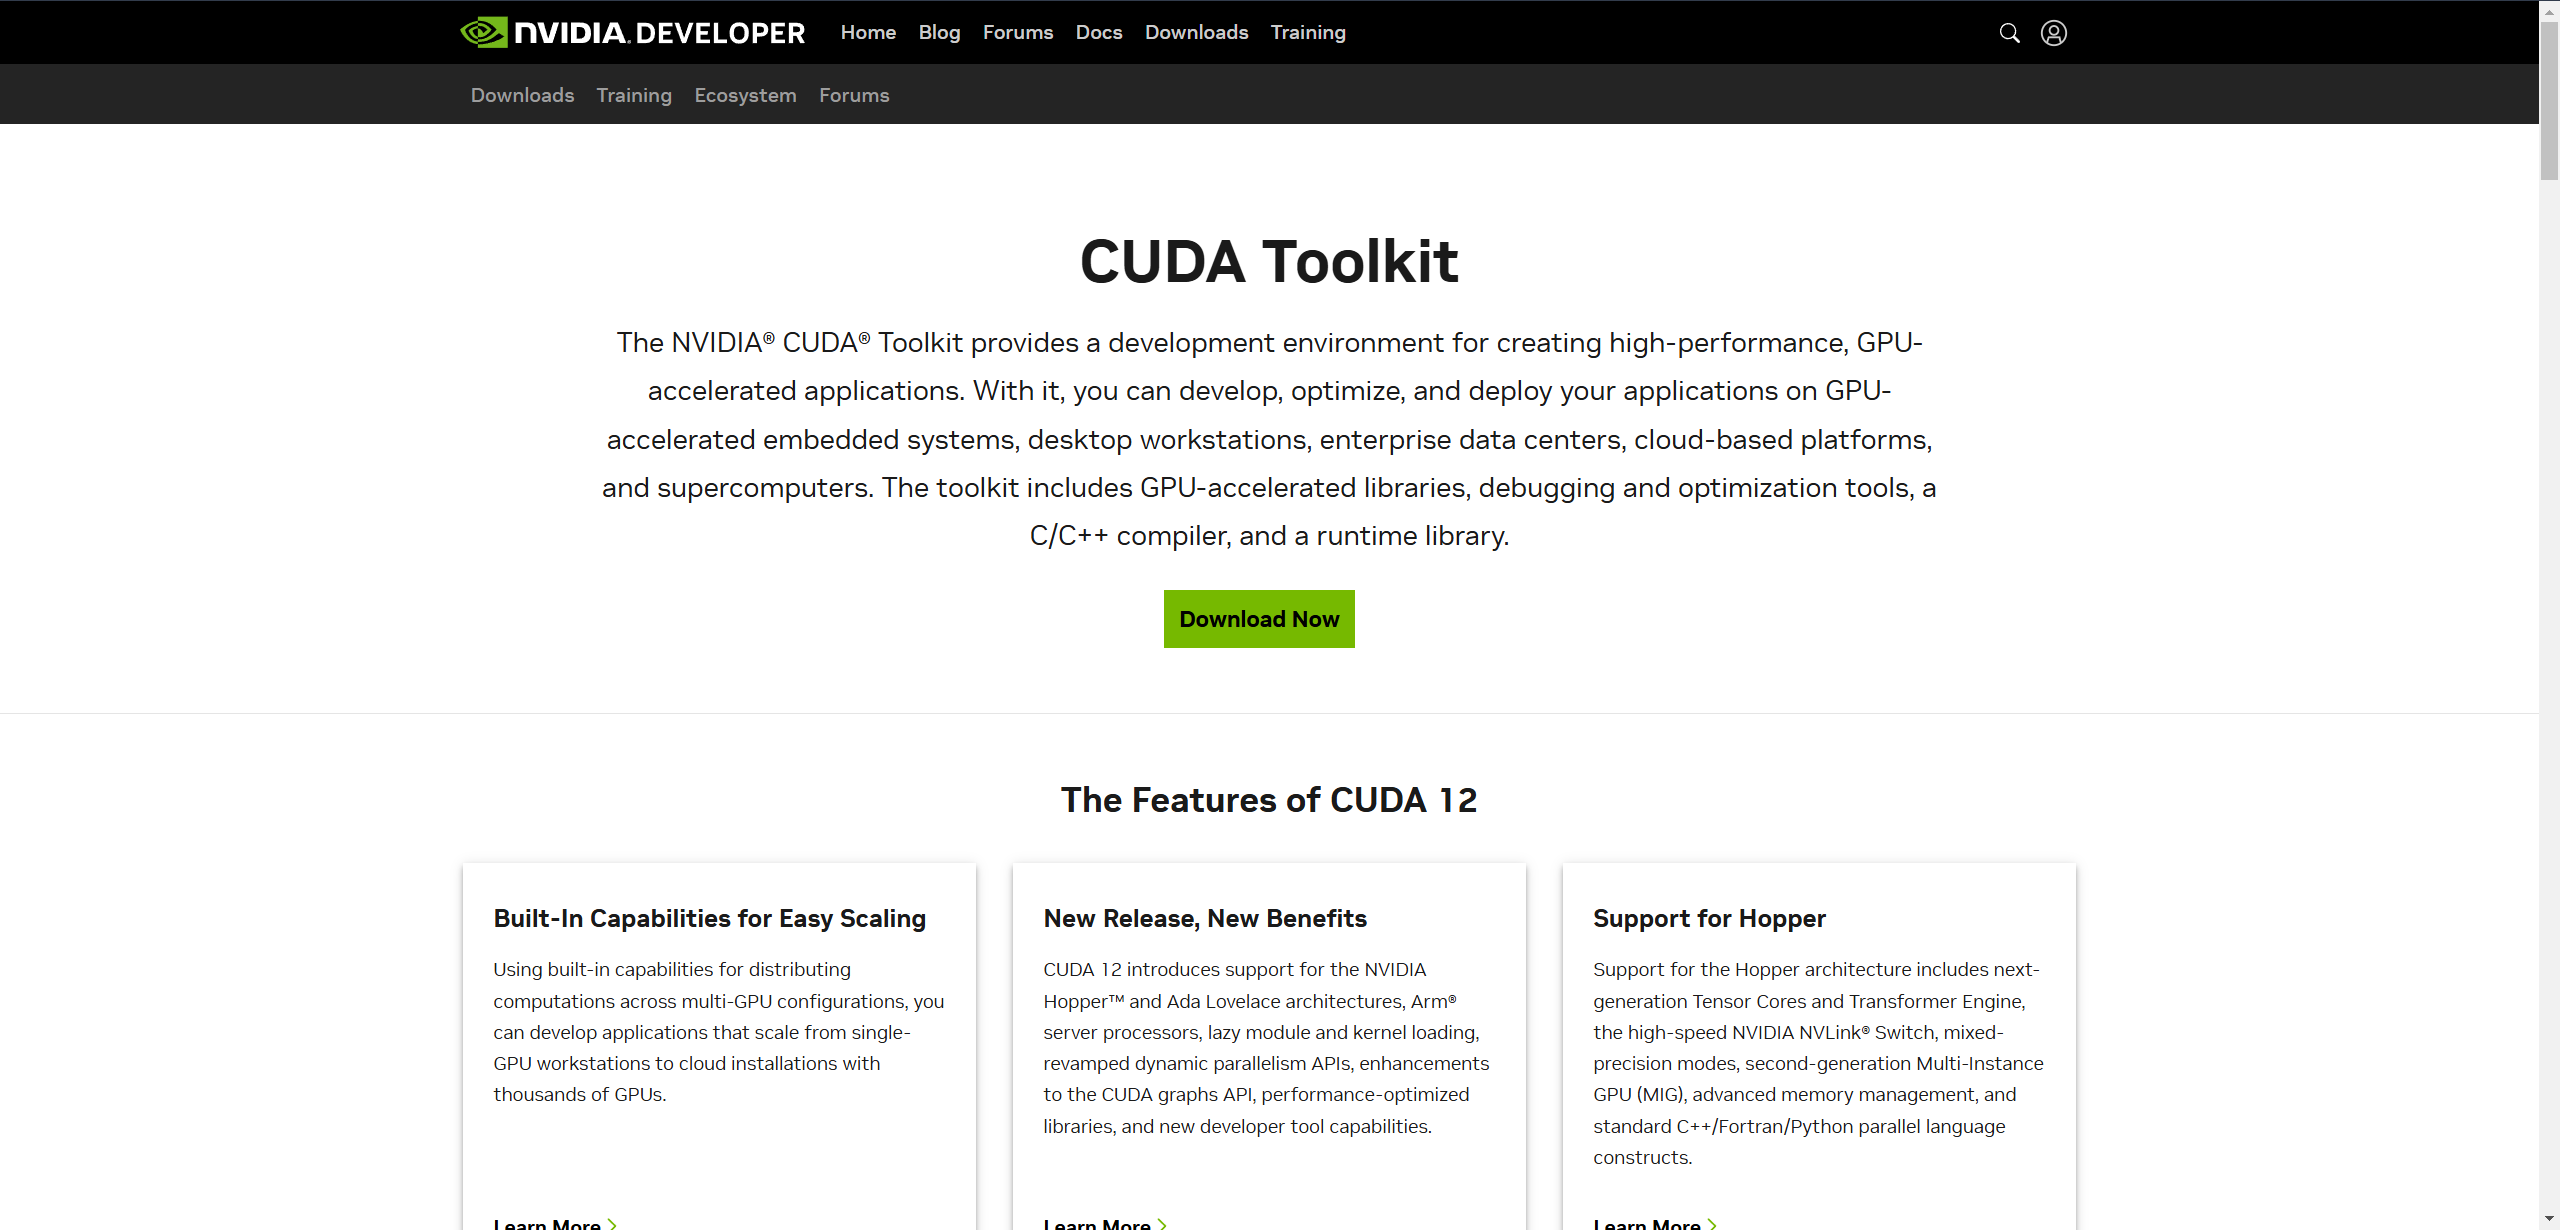
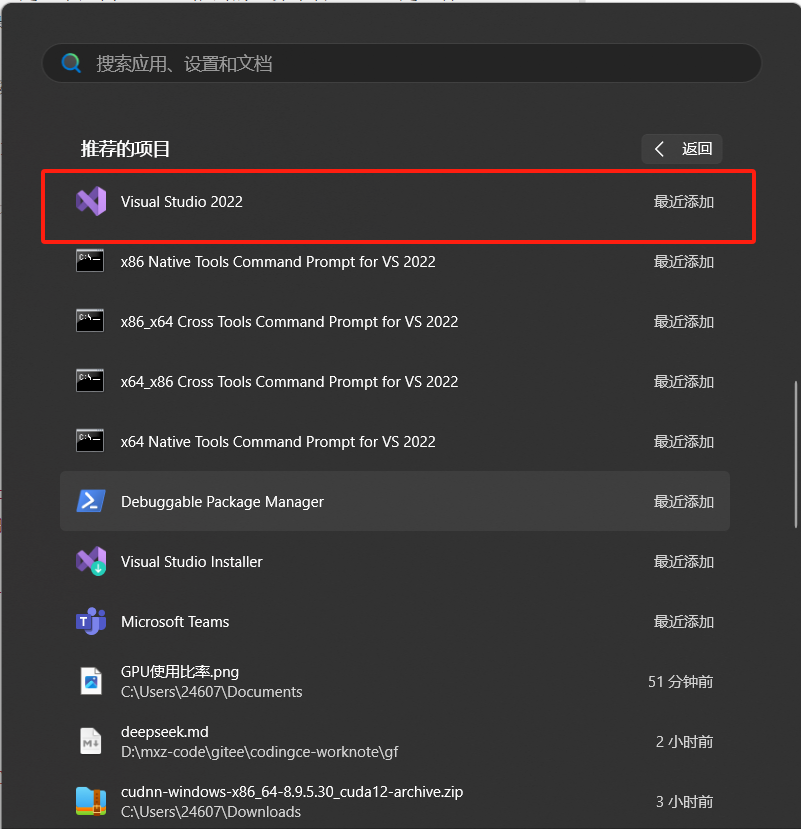
安装CUDA前先安装VS Community,不安装的话,直接安装CUDA会报错,下载链接:
https://my.visualstudio.com/Downloads?PId=8228
下载前需要注册登陆账号,目前可以下载的版本可能只有2022版的,不过问题不大,也可以用。
有缘自会相逢,之前在学校的时候这东西安装容易卸载难,想不到毕业两年多还会在下回来。(所有环境,虽然默认安装好多不在C盘,但是也把我C盘吃了40多个G)
PS C:\Users\24607> nvcc -V
nvcc: NVIDIA (R) Cuda compiler driver
Copyright (c) 2005-2024 NVIDIA Corporation
Built on Wed_Oct_30_01:18:48_Pacific_Daylight_Time_2024
Cuda compilation tools, release 12.6, V12.6.85
Build cuda_12.6.r12.6/compiler.35059454_0
PS C:\Users\24607>

# 主要为为了有 CUDA Version: 12.6 环境,不然不能训练!!! 具体安装网上教程一大堆可查看适配自己显卡
PS C:\Users\24607> nvidia-smi
Sat Mar  1 19:46:13 2025
+-----------------------------------------------------------------------------------------+
| NVIDIA-SMI 561.17                 Driver Version: 561.17         CUDA Version: 12.6     |
|-----------------------------------------+------------------------+----------------------+
| GPU  Name                  Driver-Model | Bus-Id          Disp.A | Volatile Uncorr. ECC |
| Fan  Temp   Perf          Pwr:Usage/Cap |           Memory-Usage | GPU-Util  Compute M. |
|                                         |                        |               MIG M. |
|=========================================+========================+======================|
|   0  NVIDIA GeForce RTX 3050 ...  WDDM  |   00000000:01:00.0  On |                  N/A |
| N/A   50C    P8              4W /   95W |    1738MiB /   4096MiB |      5%      Default |
|                                         |                        |                  N/A |
+-----------------------------------------+------------------------+----------------------+

+-----------------------------------------------------------------------------------------+
| Processes:                                                                              |
|  GPU   GI   CI        PID   Type   Process name                              GPU Memory |
|        ID   ID                                                               Usage      |
|=========================================================================================|
|    0   N/A  N/A      2440    C+G   ...CBS_cw5n1h2txyewy\TextInputHost.exe      N/A      |
|    0   N/A  N/A      2896    C+G   ...m\radeonsoftware\RadeonSoftware.exe      N/A      |
|    0   N/A  N/A     10120    C+G   C:\Windows\explorer.exe                     N/A      |
|    0   N/A  N/A     10200    C+G   C:\Windows\System32\ShellHost.exe           N/A      |
|    0   N/A  N/A     10844    C+G   D:\Microsoft VS Code\Code.exe               N/A      |
|    0   N/A  N/A     11136    C+G   ...__8wekyb3d8bbwe\WindowsTerminal.exe      N/A      |
|    0   N/A  N/A     12524    C+G   ...nt.CBS_cw5n1h2txyewy\SearchHost.exe      N/A      |
|    0   N/A  N/A     12548    C+G   ...2txyewy\StartMenuExperienceHost.exe      N/A      |
|    0   N/A  N/A     13876    C+G   ...oogle\Chrome\Application\chrome.exe      N/A      |
|    0   N/A  N/A     14300    C+G   ...t.LockApp_cw5n1h2txyewy\LockApp.exe      N/A      |
|    0   N/A  N/A     14752    C+G   ...on\133.0.3065.92\msedgewebview2.exe      N/A      |
|    0   N/A  N/A     16780    C+G   ...nr4m\radeonsoftware\AMDRSSrcExt.exe      N/A      |
|    0   N/A  N/A     16928    C+G   ...5n1h2txyewy\ShellExperienceHost.exe      N/A      |
|    0   N/A  N/A     17804    C+G   ...1\extracted\runtime\WeChatAppEx.exe      N/A      |
|    0   N/A  N/A     19564      C   ...naconda3\envs\tensorflow\python.exe      N/A      |
|    0   N/A  N/A     21280    C+G   D:\MyApp\Typora\Typora.exe                  N/A      |
+-----------------------------------------------------------------------------------------+
环境验证
import torch

# 输出带CPU, 表示torch是CPU版本的, 否则会是 +cuxxx
print(f'torch 的版本是:{torch.__version__}')
#
print(f'torch 是否能使用cuda:{torch.cuda.is_available()}')
输出 LOG
(tensorflow) PS D:\mxz-code\ai\python> python test.py
torch的版本是:2.5.1
torch是否能使用cuda:True
(tensorflow) PS D:\mxz-code\ai\python>
LLaMA-Factory 安装
按照GitHub上安装即可(注意用GPU的环境,不然会报"未检测到CUDA环境",导致无法训练)。
git clone --depth 1 https://github.com/hiyouga/LLaMA-Factory.git
cd LLaMA-Factory
pip install -e ".[torch,metrics]"
# 运行UI, 注意在 LLaMA-Factory 根目录执行
llamafactory-cli webui
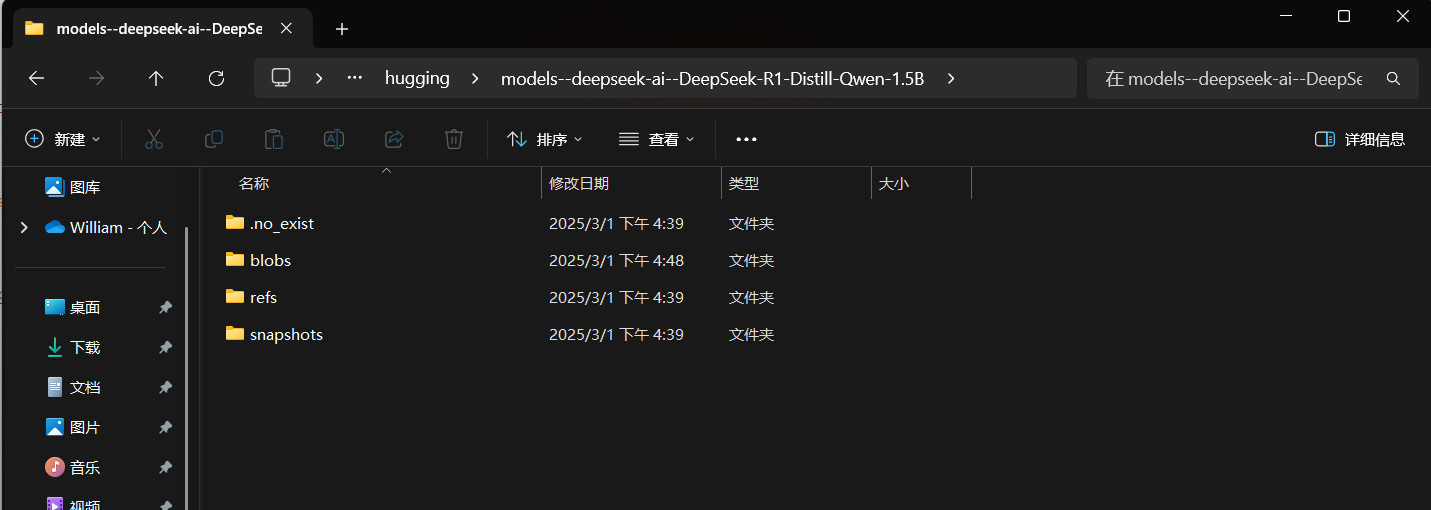
deepseek-ai/DeepSeek-R1-Distill-Qwen-1.5B
会下载到本地,本地目录如下:
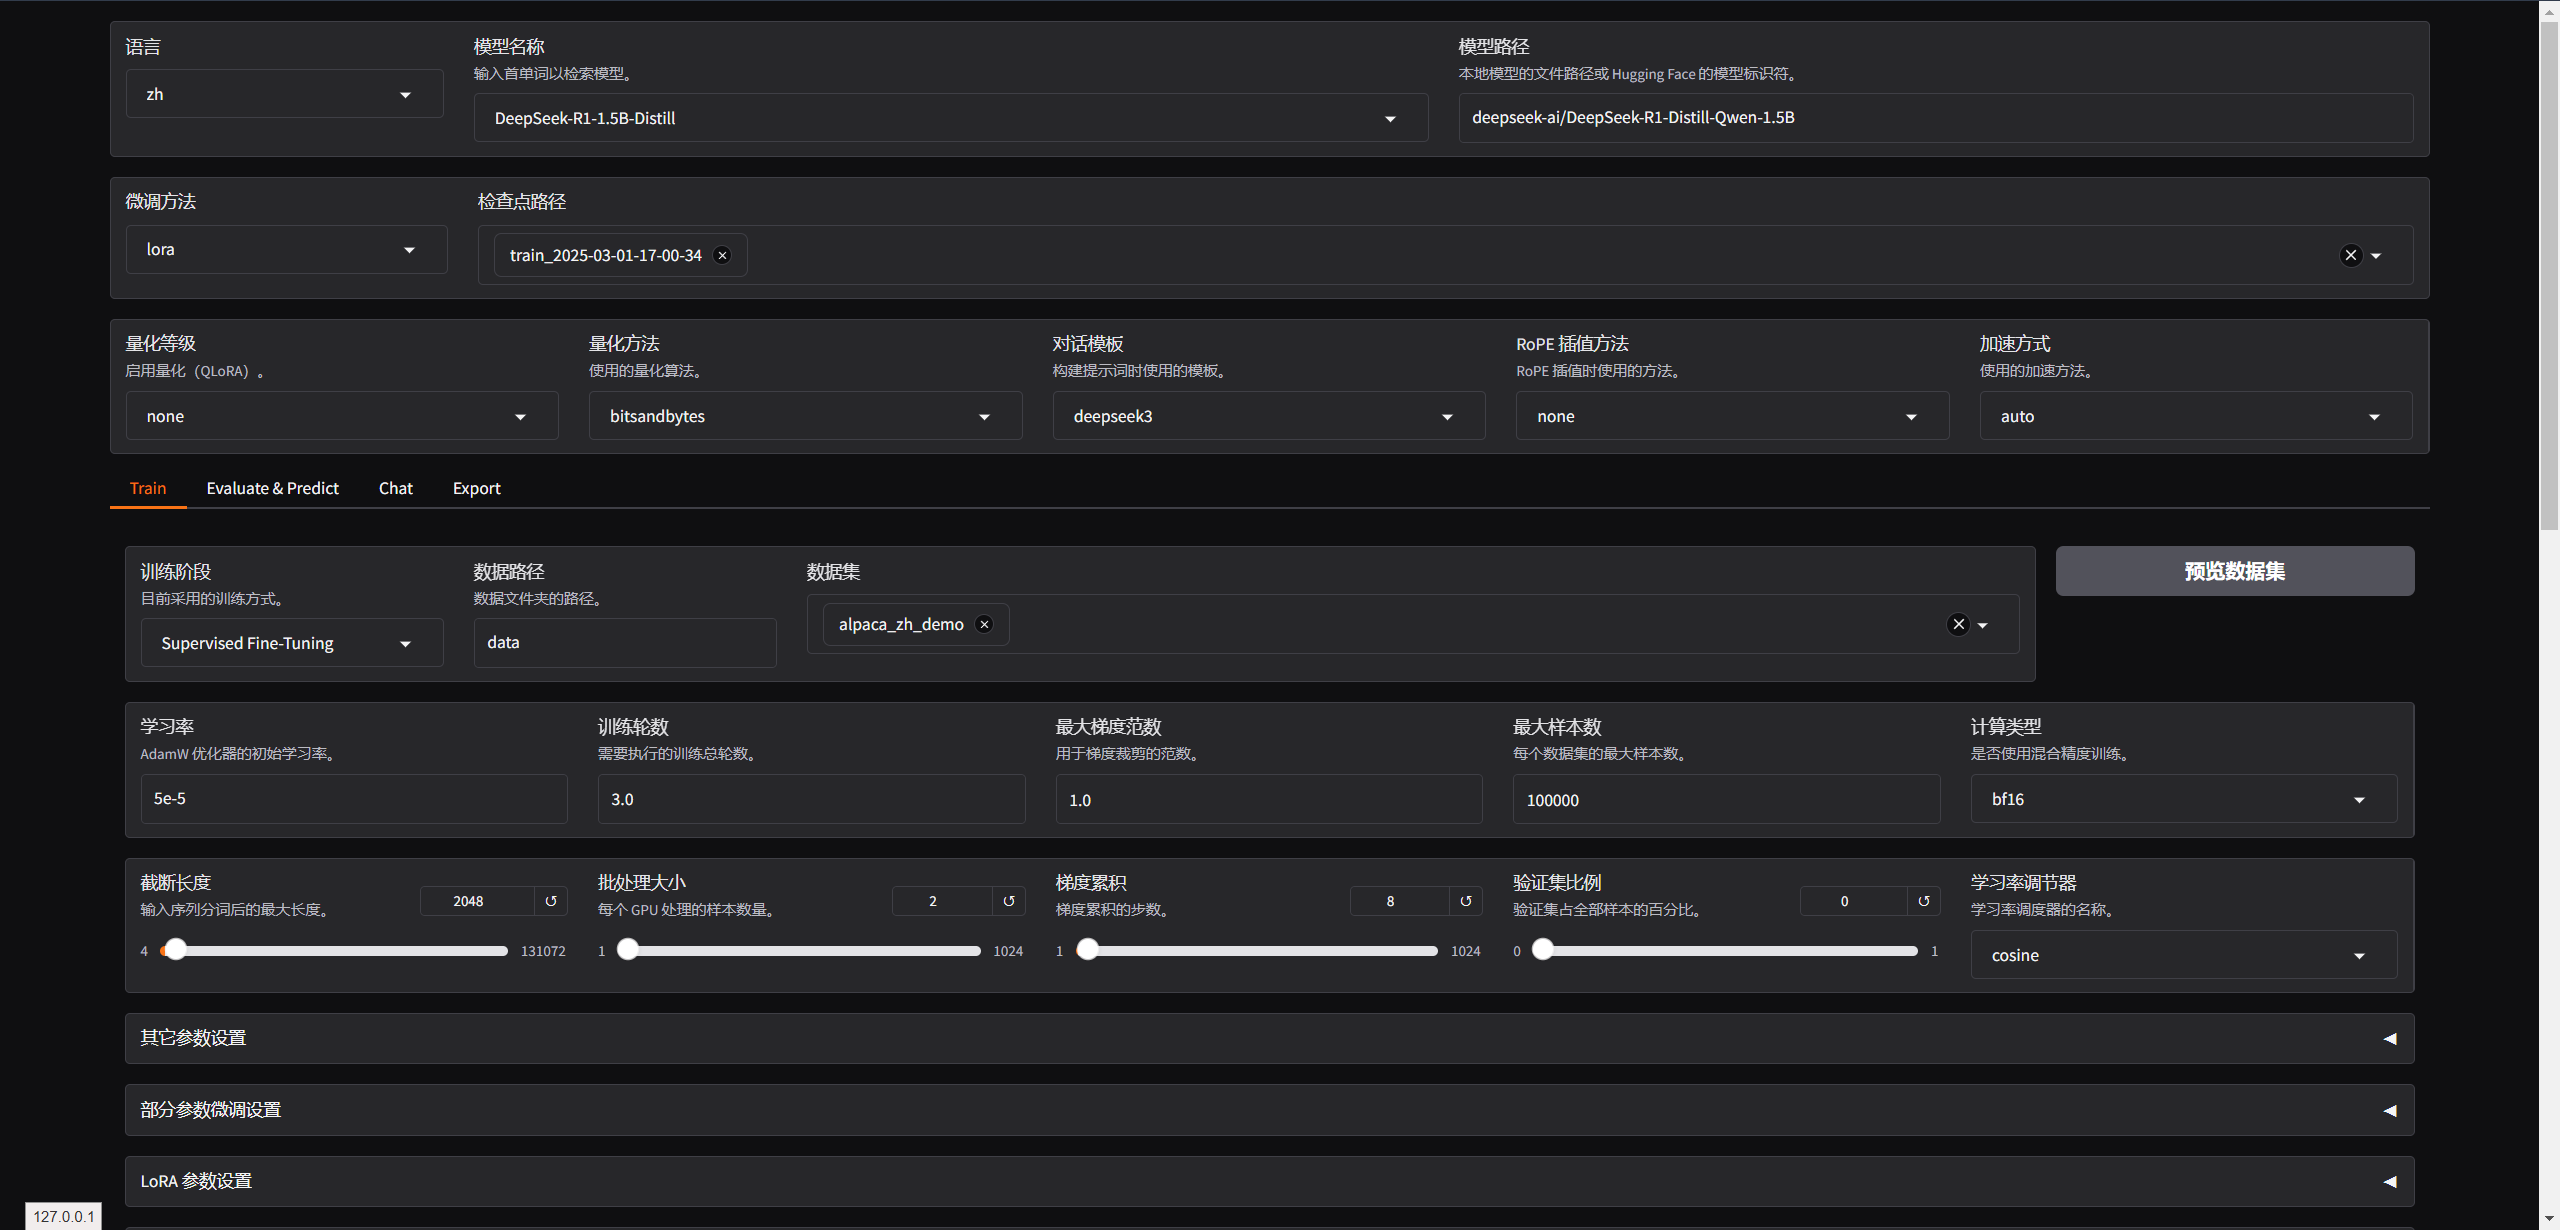
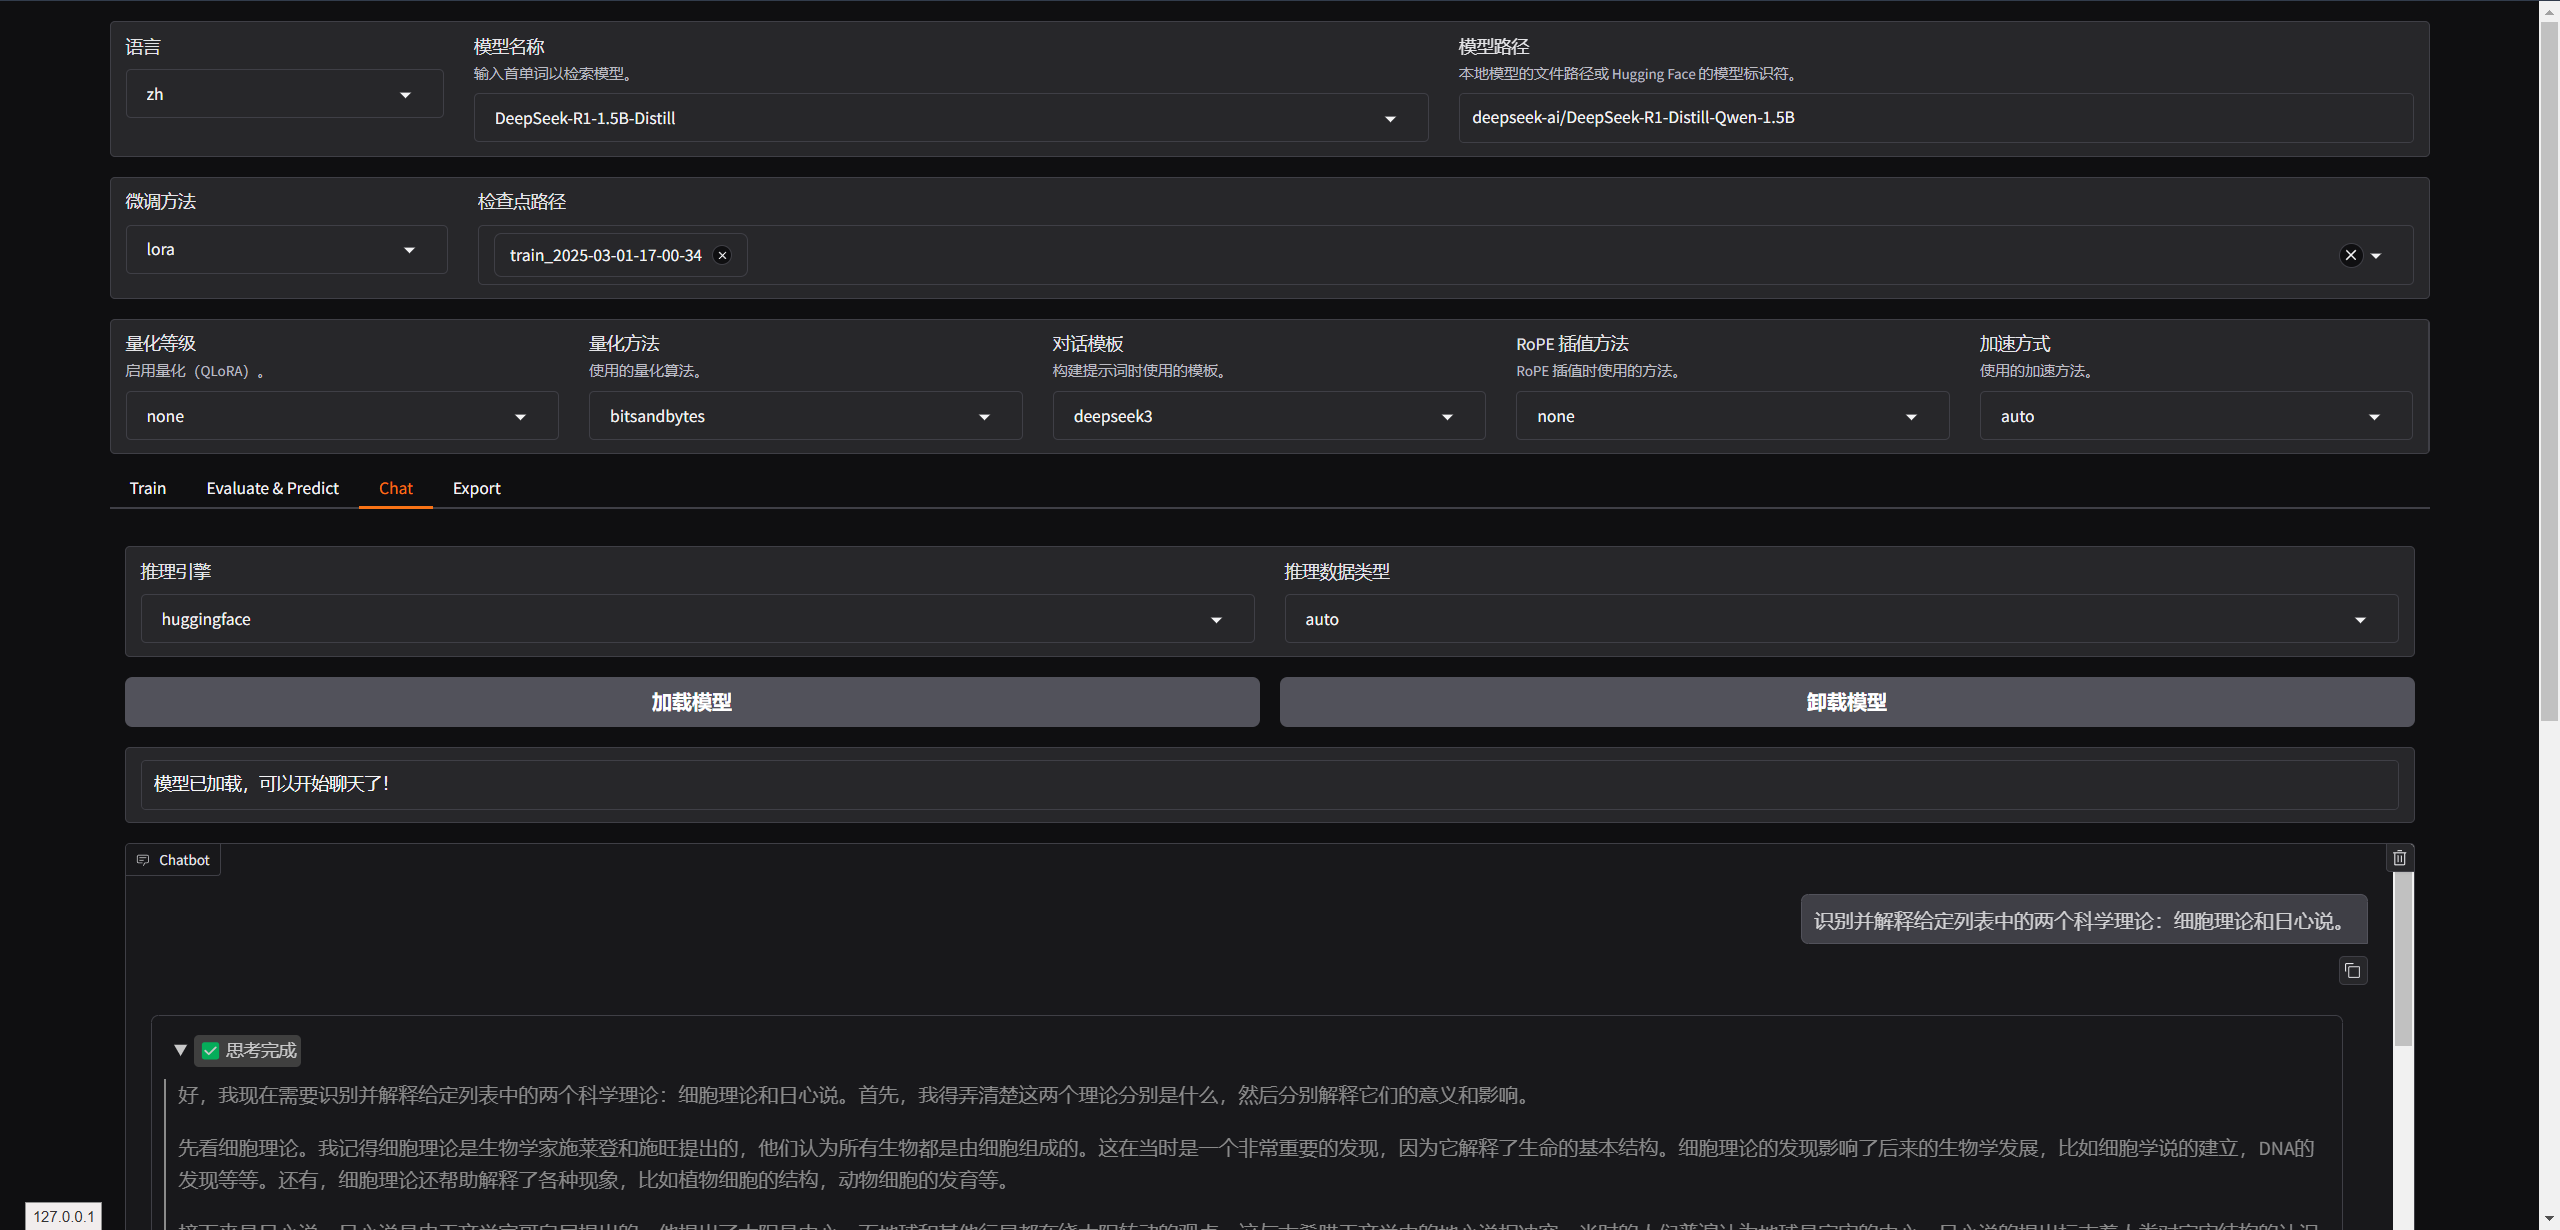
加载模型
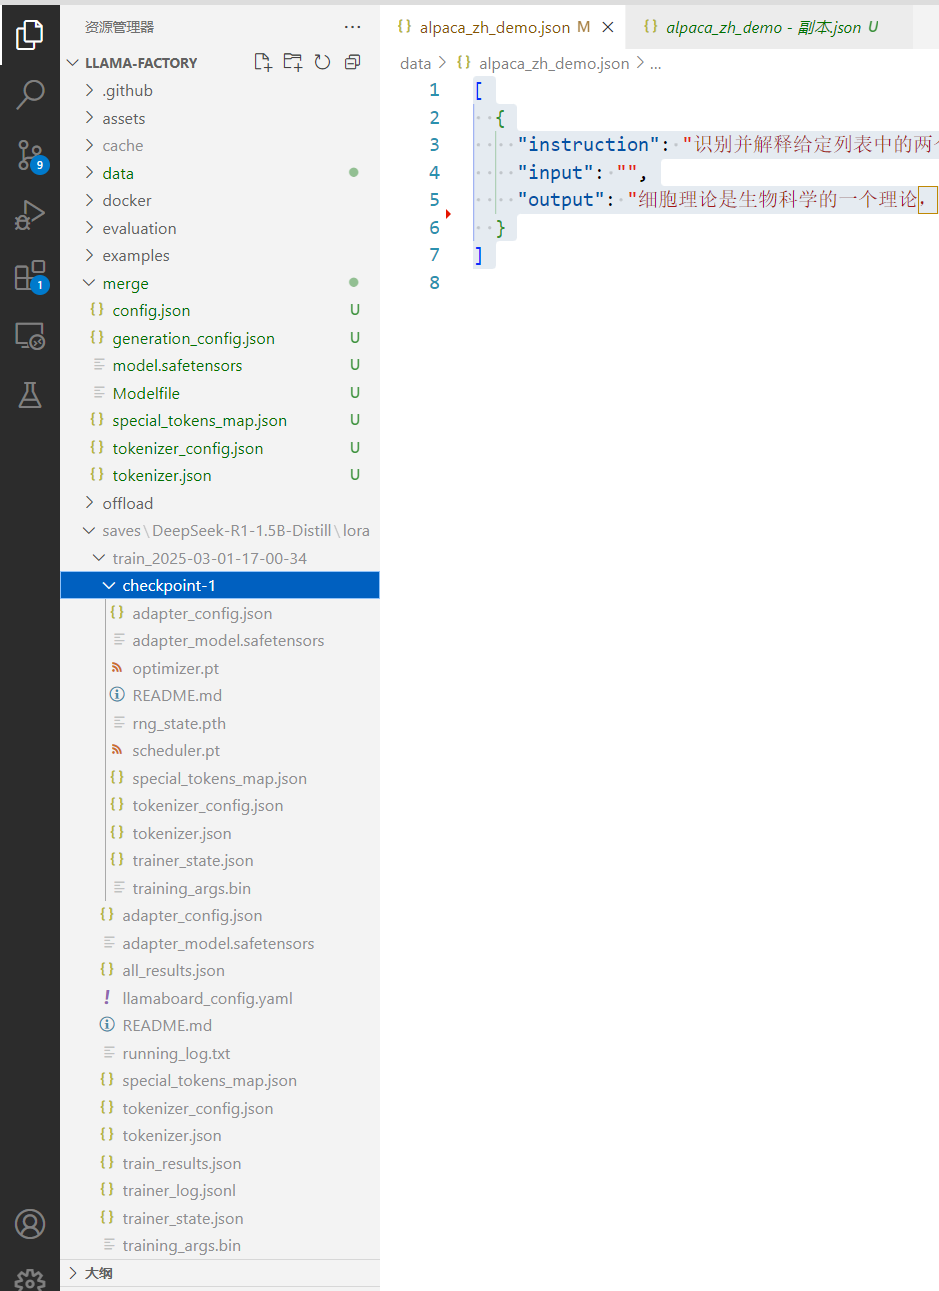
训练数据

使用官方预设(我显卡不行,所以就用了一条,本次走这个流程完全是为了学习使用,随便一跑,显存就满)
[
  {
    "instruction": "识别并解释给定列表中的两个科学理论:细胞理论和日心说。",
    "input": "",
    "output": "细胞理论是生物科学的一个理论,它认为所有生命体都是由微小的基本单元——细胞所构成。这是生物学的一个基础理论,认为细胞是所有生物的基本结构和功能单位,所有的生物都是由一个或多个细胞组成,细胞只能通过细胞分裂产生新的细胞。这一理论由薛定谔、施瓦内和雪莱于1839年首次提出。\n\n日心说是指太阳是太阳系的中心,也就是说,行星围绕太阳旋转的理论。这个理论打破了传统的地心说观点,认为地球并不是宇宙的中心。日心说的提出者是尼古拉·哥白尼,他在16世纪初发表了他的著作《天体运行论》,阐述了太阳系行星围绕太阳运行的模型,为天文学的发展做出了巨大贡献。"
  }
]
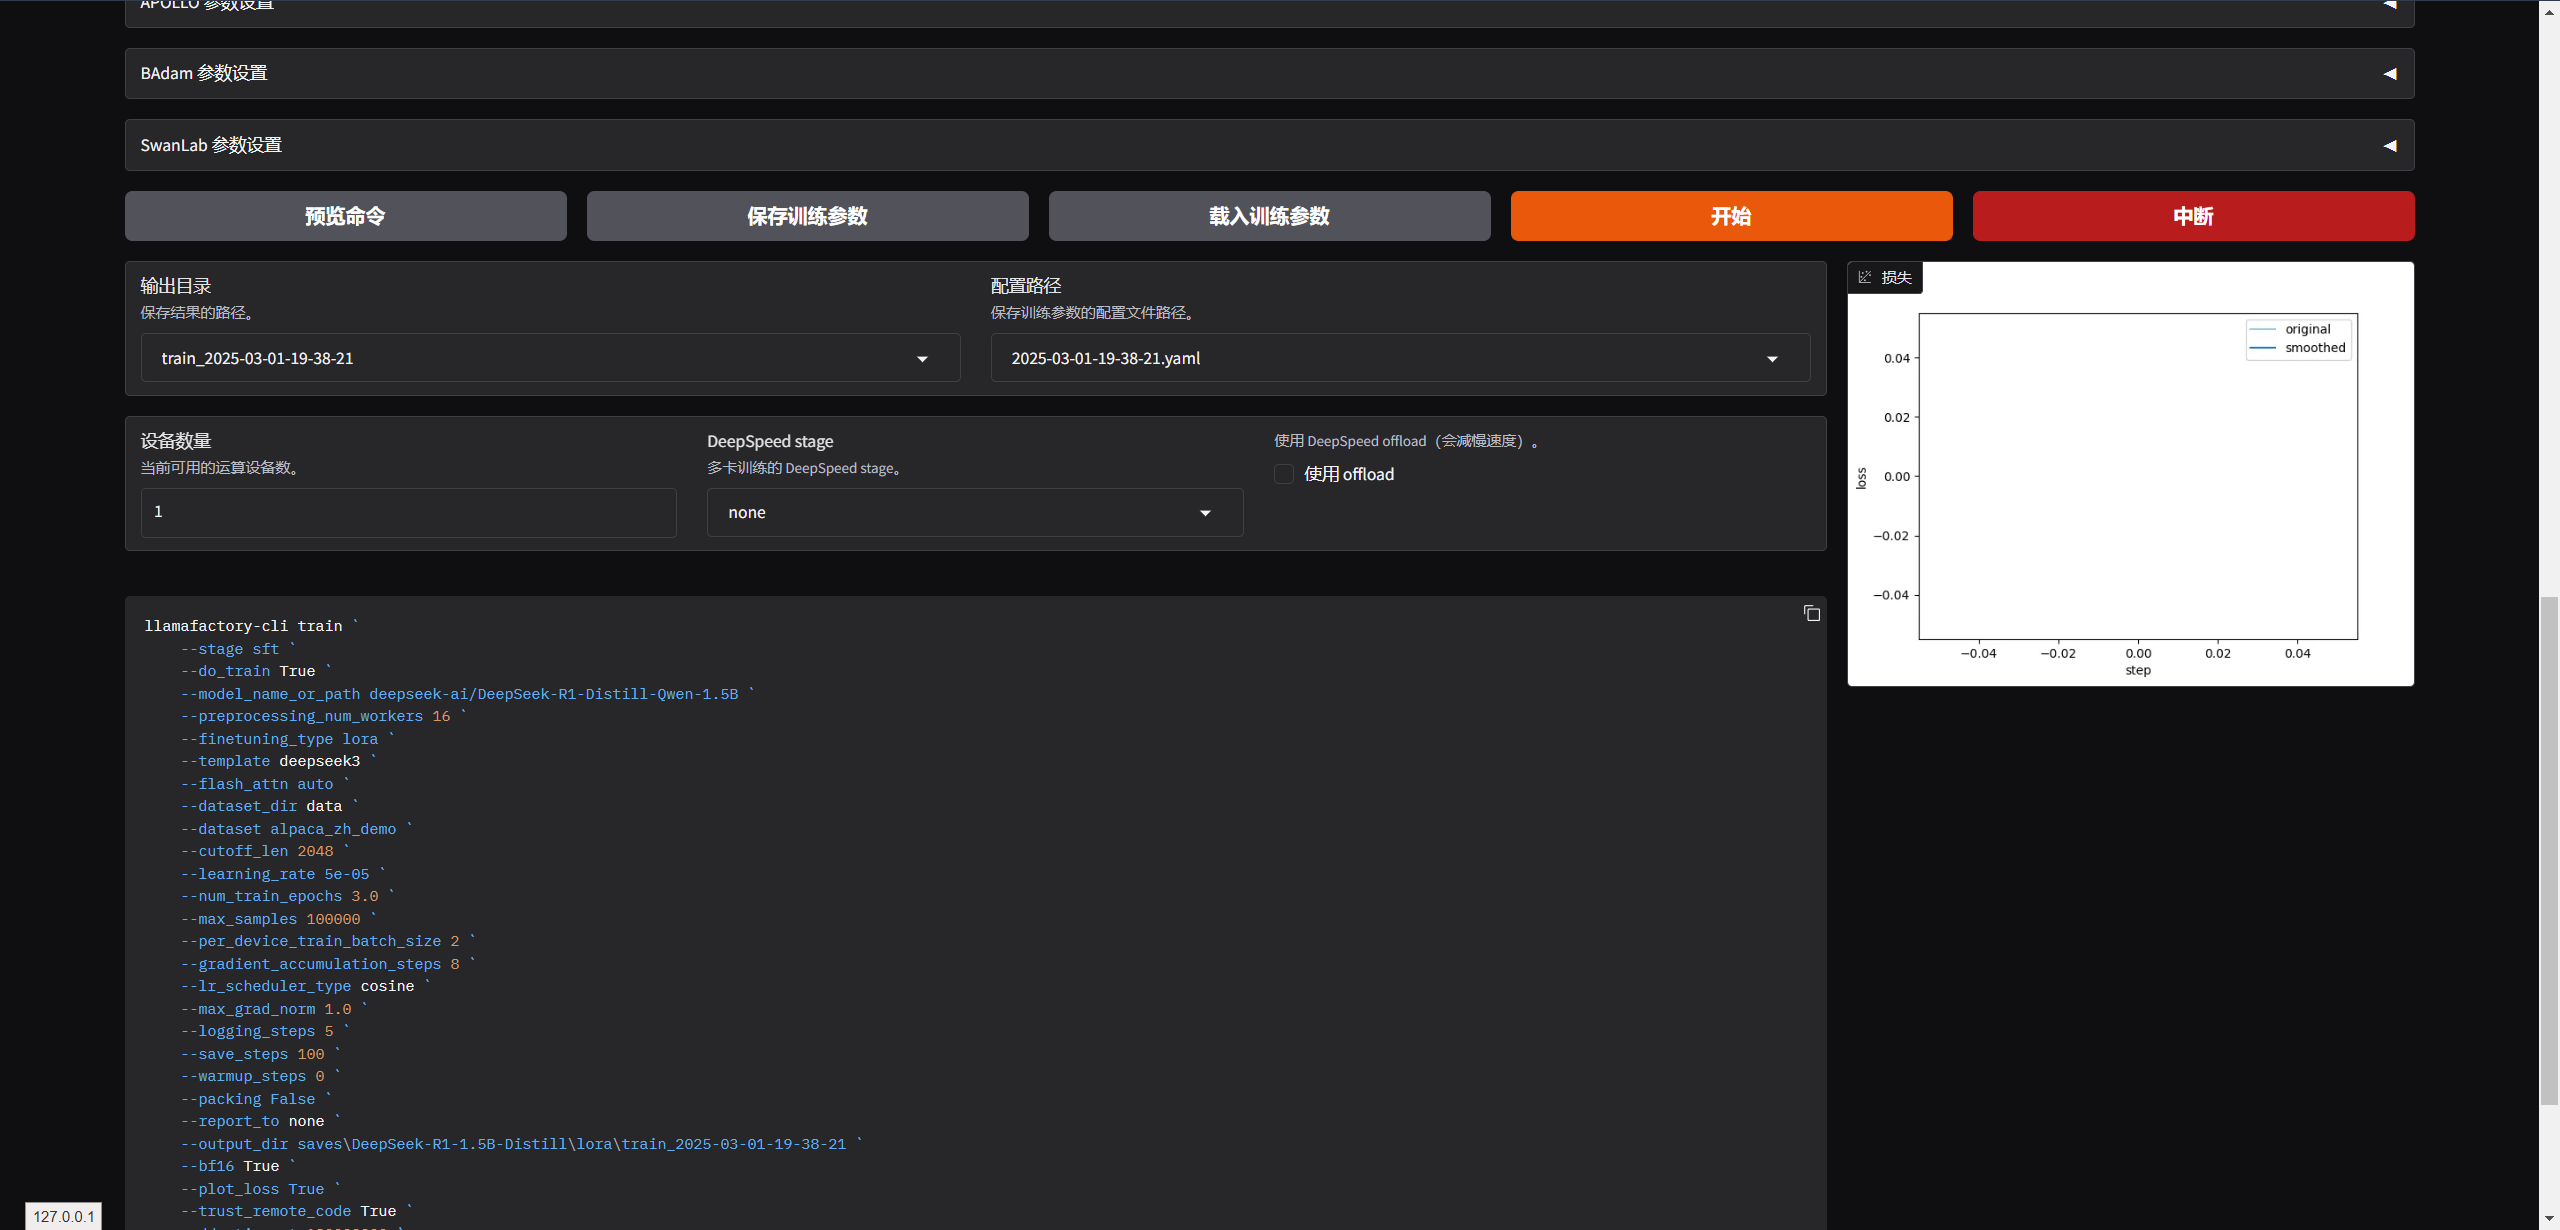
预览命令
llamafactory-cli train `
    --stage sft `
    --do_train True `
    --model_name_or_path deepseek-ai/DeepSeek-R1-Distill-Qwen-1.5B `
    --preprocessing_num_workers 16 `
    --finetuning_type lora `
    --template deepseek3 `
    --flash_attn auto `
    --dataset_dir data `
    --dataset alpaca_zh_demo `
    --cutoff_len 2048 `
    --learning_rate 5e-05 `
    --num_train_epochs 3.0 `
    --max_samples 100000 `
    --per_device_train_batch_size 2 `
    --gradient_accumulation_steps 8 `
    --lr_scheduler_type cosine `
    --max_grad_norm 1.0 `
    --logging_steps 5 `
    --save_steps 100 `
    --warmup_steps 0 `
    --packing False `
    --report_to none `
    --output_dir saves\DeepSeek-R1-1.5B-Distill\lora\train_2025-03-01-19-38-21 `
    --bf16 True `
    --plot_loss True `
    --trust_remote_code True `
    --ddp_timeout 180000000 `
    --include_num_input_tokens_seen True `
    --optim adamw_torch `
    --lora_rank 8 `
    --lora_alpha 16 `
    --lora_dropout 0 `
    --lora_target all
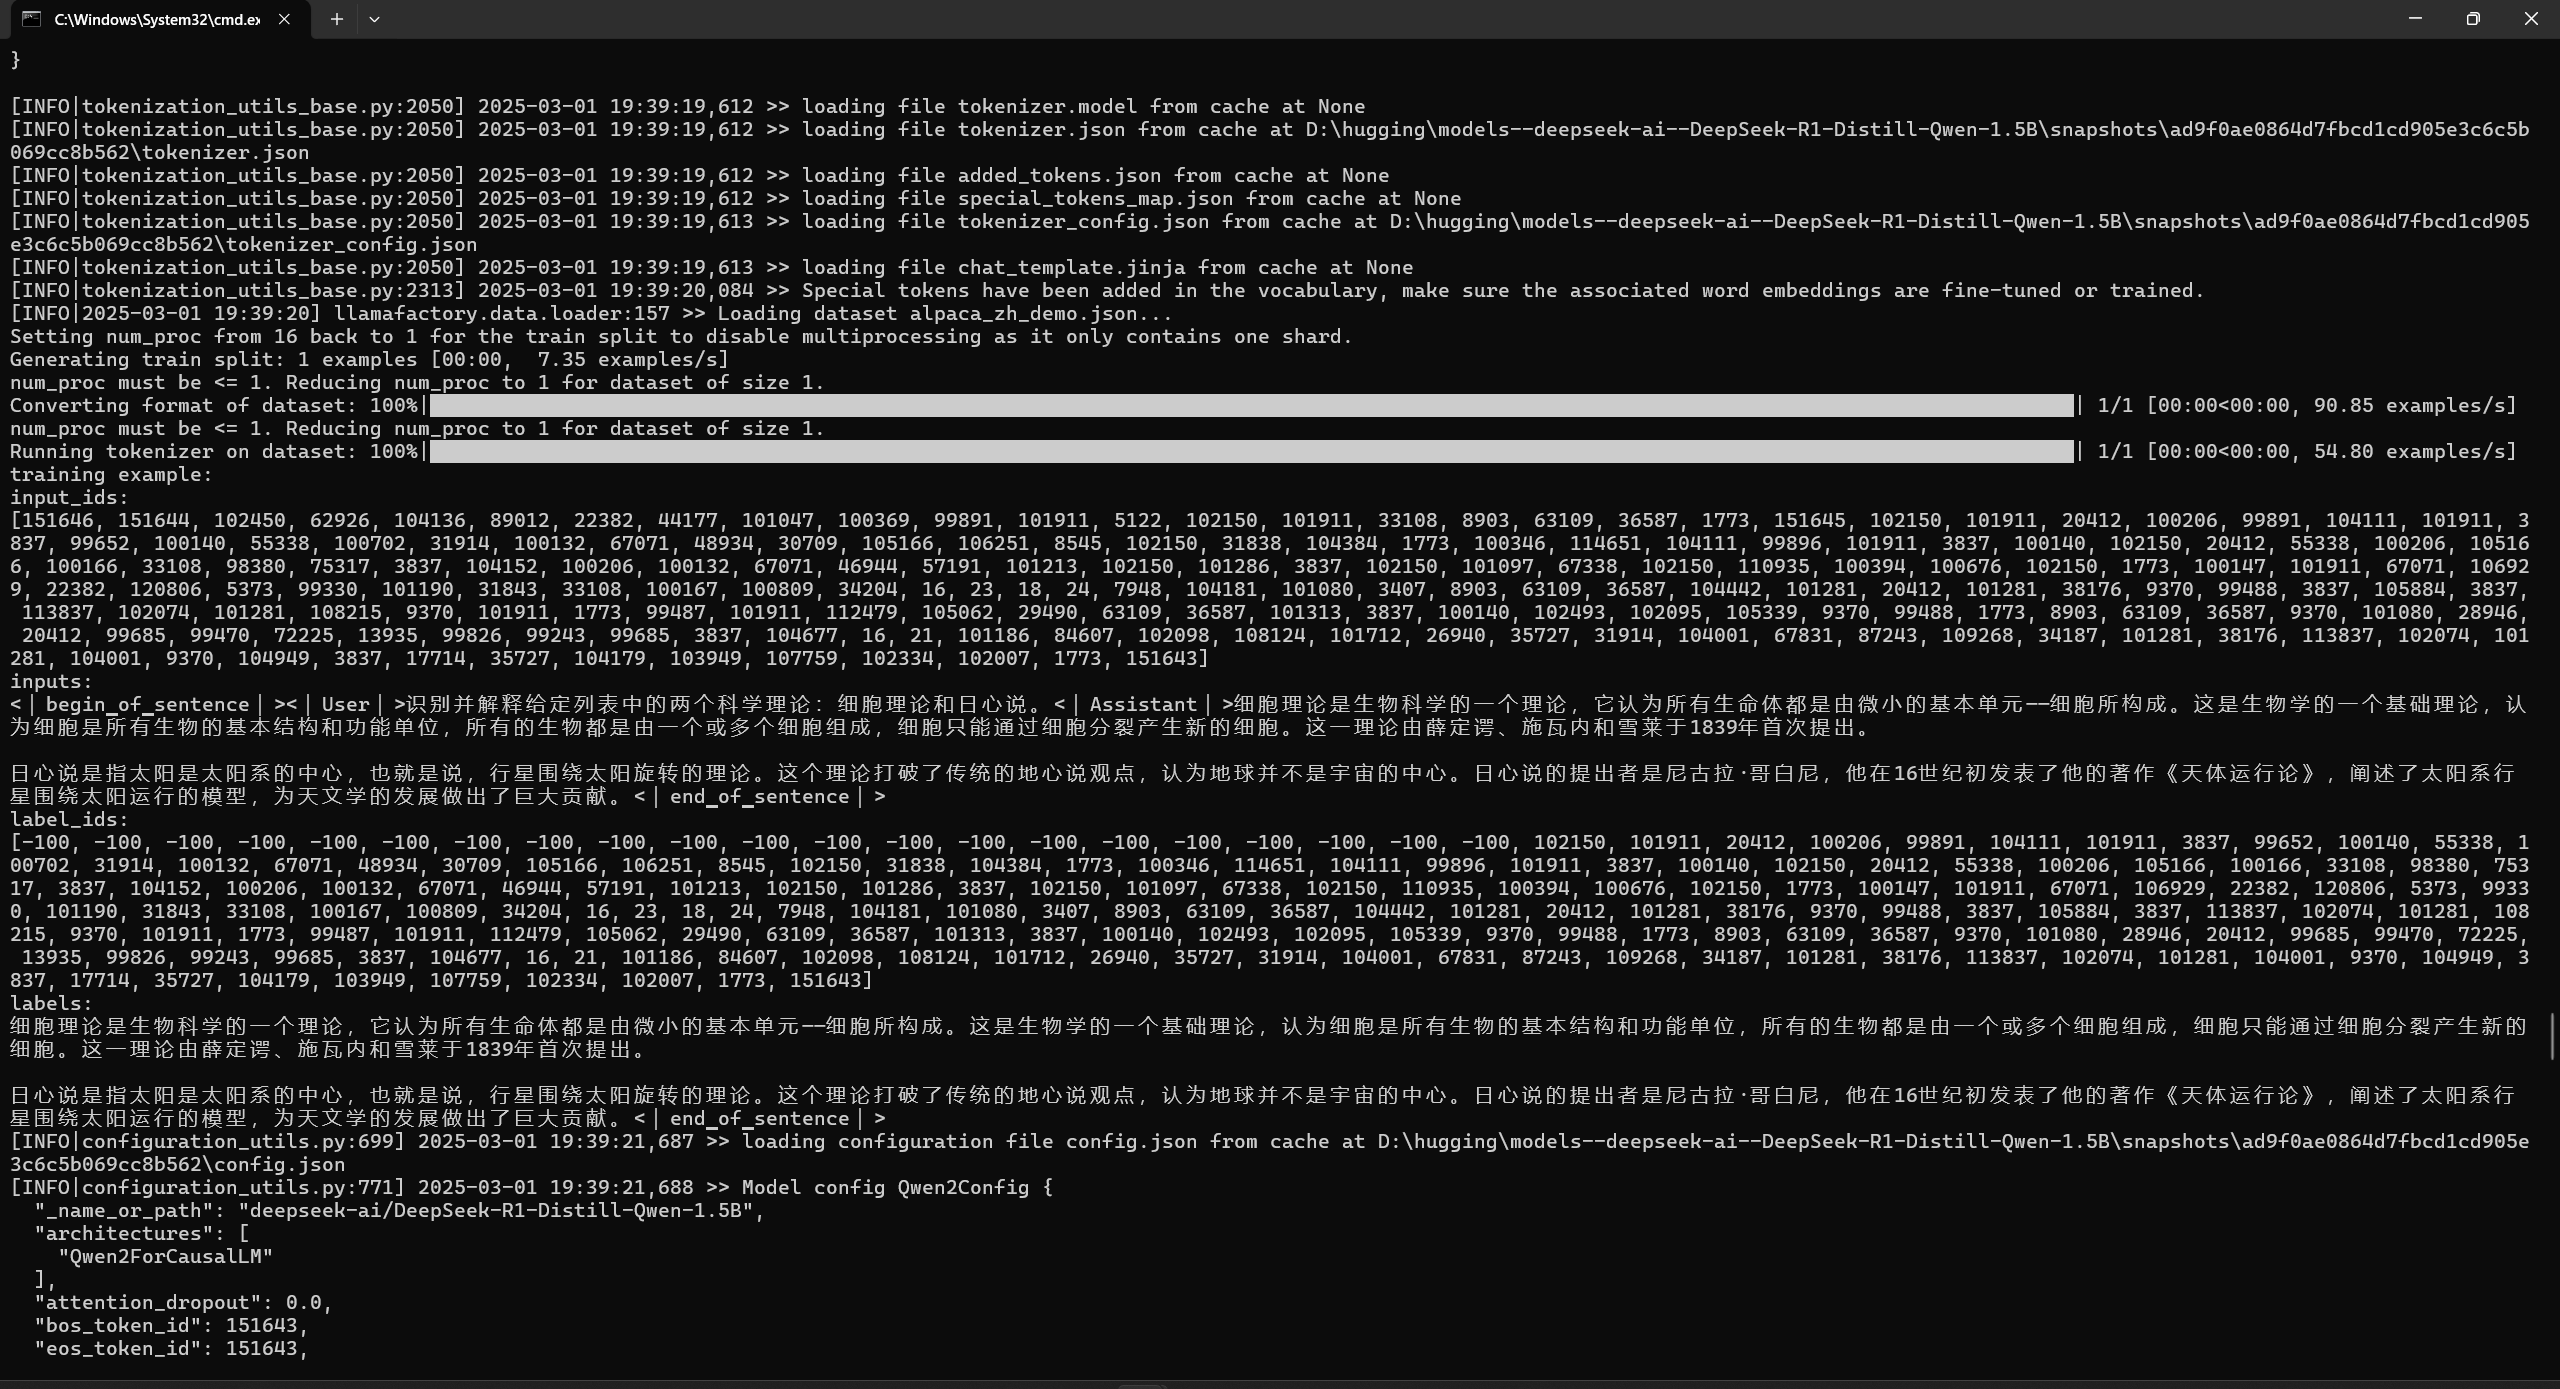
开始训练控制台LOG
训练结束
导出界面
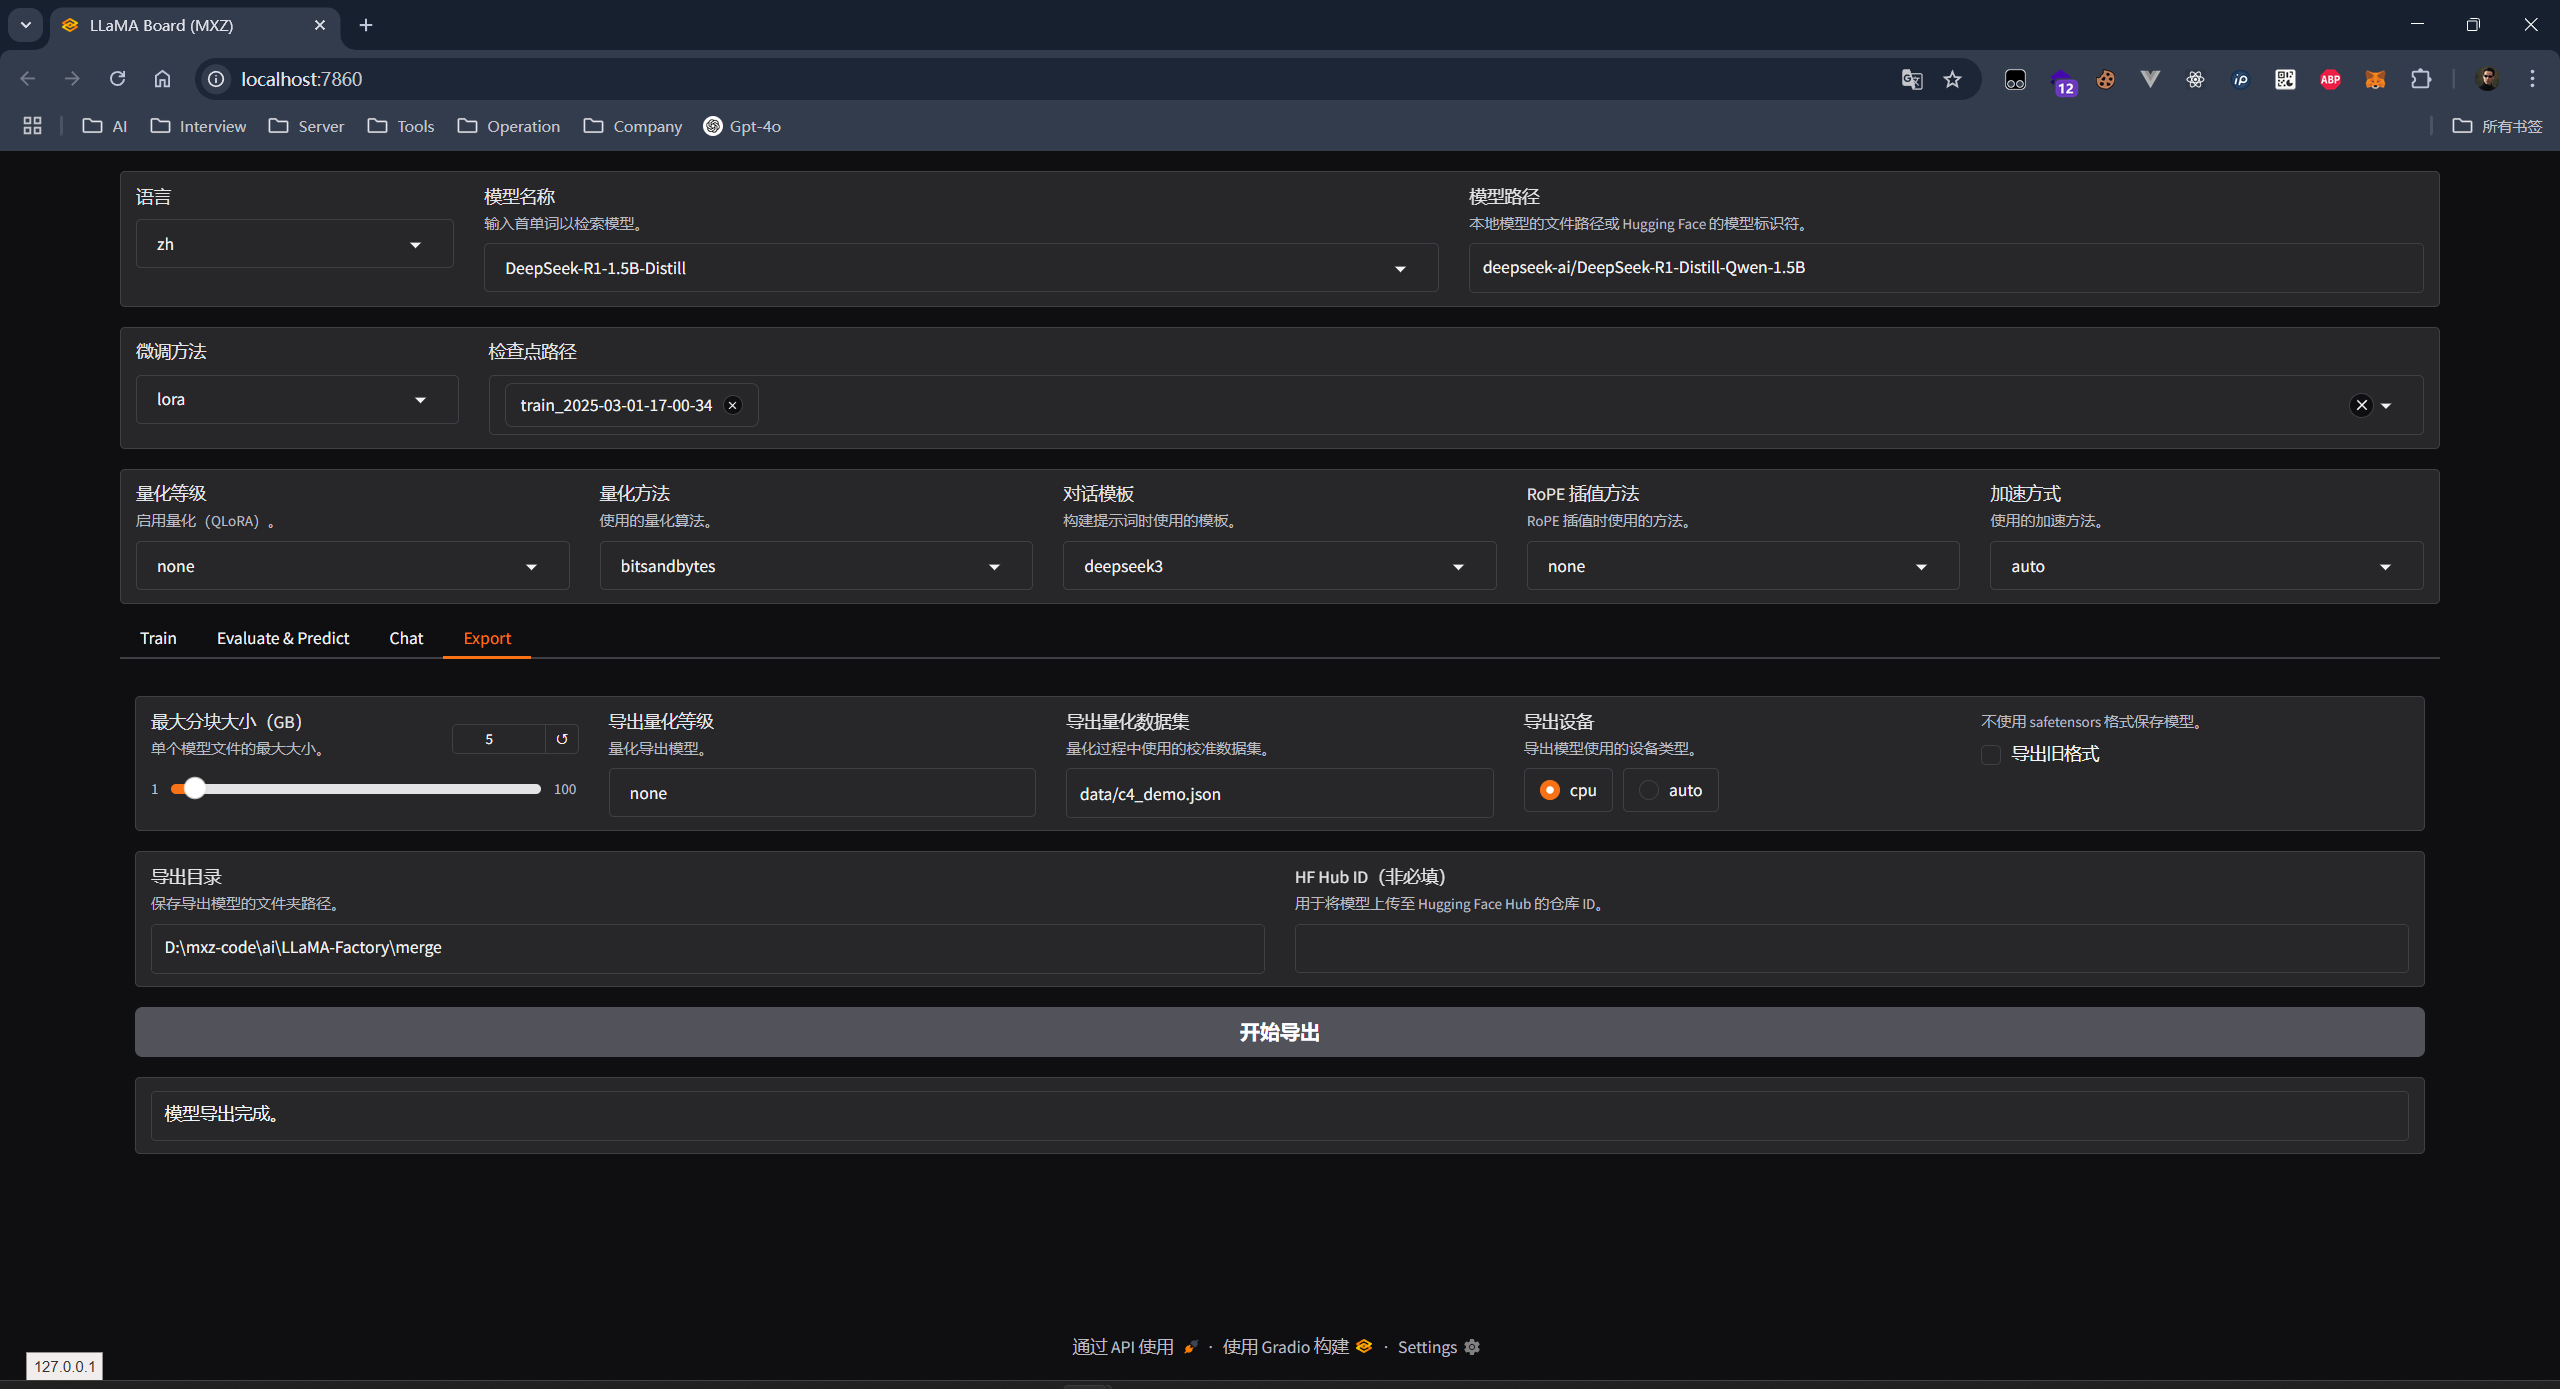
导出微调模型
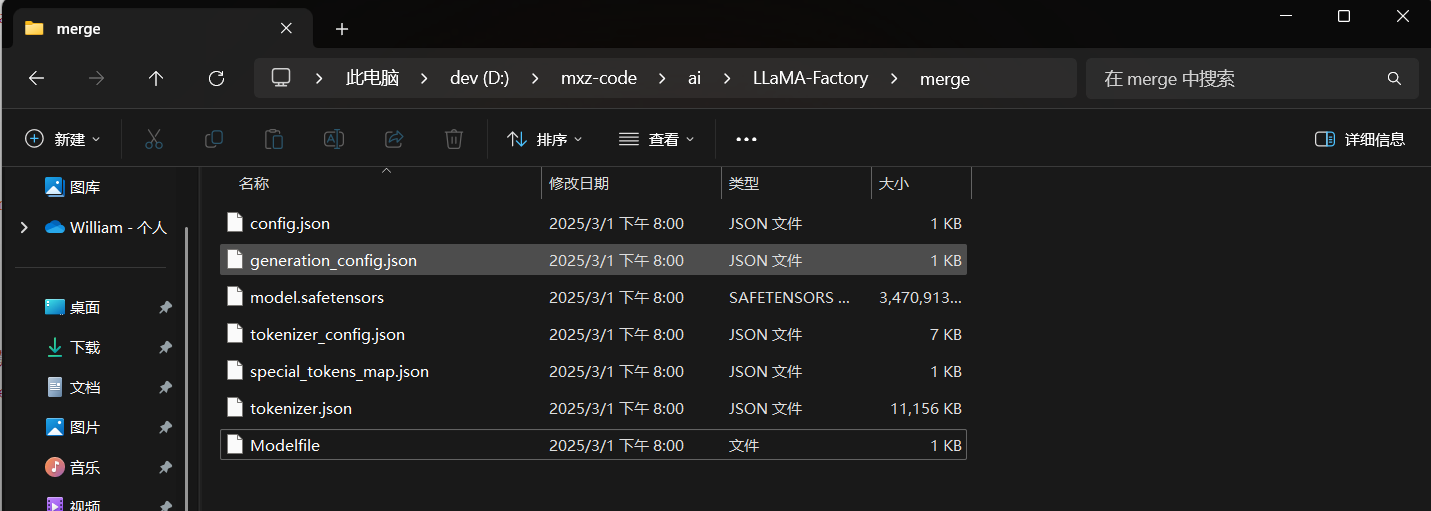
# 导出模型后, 在导出模型的根目录执行 ollama 命令
ollama create my-deepseek-r1 -f ./Modelfile\

# 下面就是精调模型
(base) PS C:\Users\24607> ollama list
NAME                     ID              SIZE      MODIFIED
my-deepseek-r1:latest    d2e8cdd3cc91    3.6 GB    1 second ago
deepseek-r1:8b           28f8fd6cdc67    4.9 GB    2 weeks ago
(base) PS C:\Users\24607>
源码获取
关注gzh后端码匠,回复"DeepSeek"消息即可获取完整源码。
结语
通过本文的进阶指南,我们成功将原有的 Spring Boot3 + Vue2 AI 对话系统升级为 Spring Boot3 + Vue3 架构,并引入了上下文感知和模型微调技术。技术无止境,创新不停歇。期待与大家在 AI 技术的道路上共同进步,创造更多可能!
#deepseek#

 查看12道真题和解析